
Warcraft III
## Game Introduction: Warcraft III **Warcraft III** is a landmark real-time strategy (RTS) game developed and published by **Blizzard Entertainment**. It originally launched in **2002** as *Warcraft III: Reign of Chaos*, followed by the expansion *Warcraft III: The Frozen Throne* in **2003**. In **...

Download & Installation
Download & Installation Guide for Warcraft III (Reforged & Classic)
Warcraft III is available for PC (Windows and Mac) exclusively through Blizzard Entertainment's official platform, Battle.net. There are no console (PlayStation, Xbox, Switch) or mobile versions of the game. This guide covers downloading and installing Warcraft III: Reforged (the current definitive edition that also contains the classic graphics option) and the legacy Warcraft III: Reign of Chaos / The Frozen Throne classic versions (if you own them).
Official Download Sources
- Blizzard Battle.net Desktop App (recommended): [https://www.blizzard.com/download](https://www.blizzard.com/download)
- Battle.net Website for direct download: [https://www.blizzard.com/games/warcraft-iii/](https://www.blizzard.com/games/warcraft-iii/) (requires account login)
- OS: Windows 7 / Windows 8 / Windows 10 (64-bit); macOS 10.13 (High Sierra) or later
- Processor: Intel Core i5-6400 / AMD FX-8320 or better
- Memory: 8 GB RAM
- Graphics: NVIDIA GeForce GTX 660 / AMD Radeon HD 7850 (2 GB VRAM)
- DirectX: Version 11
- Storage: 30 GB available space (SSD recommended)
- Internet: Broadband connection for installation and online play
- OS: Windows 10 (64-bit) / macOS 10.15 (Catalina) or newer
- Processor: Intel Core i7-6700K / AMD Ryzen 7 2700X
- Memory: 16 GB RAM
- Graphics: NVIDIA GeForce GTX 1080 / AMD Radeon RX Vega 64 (4 GB VRAM)
- DirectX: Version 11
- Storage: 30 GB SSD
- Internet: Broadband connection
- If you don’t have an account, click "Create a free account" and follow the registration (email, password, name, etc.).
- If you have an account, log in with your email and password.
- Two-factor authentication (SMS or Authenticator app) is optional but recommended for security.
- In the Battle.net app, click the "Shop" tab or search for "Warcraft III" in the games list.
- Warcraft III: Reforged costs $29.99 (USD) and includes both Reign of Chaos and The Frozen Throne campaigns with updated graphics. You can also keep the original graphics.
- If you already own the classic Warcraft III, log into your account – the game should appear in your library automatically. If not, you may need to redeem a product key (for older CD/DVD purchases) via the "Redeem a Game Key" option in the shop.
The game is not available on Steam, Epic Games Store, or any other third-party digital storefront. Avoid downloading from unofficial sites as they may contain malware or violate Blizzard’s terms of service.
System Requirements
#### Minimum Requirements (for Reforged with classic graphics)
#### Recommended Requirements (for Reforged with HD graphics)
Note: Classic Warcraft III (original) can run on much lower specs (e.g., 2 GB RAM, DirectX 9, 4 GB storage), but Blizzard no longer offers a separate download. The Battle.net client installs the Reforged client which includes both graphics modes.
Step-by-Step Installation on PC
#### 1. Install the Battle.net Desktop App
1. Go to [https://www.blizzard.com/download](https://www.blizzard.com/download) and download the Battle.net-Setup.exe (Windows) or Battle.net-Setup.dmg (Mac).
2. Run the installer and follow the on-screen prompts. Accept the terms, choose installation folder (default is `%ProgramFiles% (x86)\Battle.net` for Windows / `/Applications/Blizzard` for Mac).
3. Launch the Battle.net app after installation.
#### 2. Create or Log into a Blizzard Account
#### 3. Purchase or Redeem Warcraft III
#### 4. Install the Game
1. In the Battle.net app, switch to the "Games" tab (left sidebar).
2. Locate Warcraft III (it will show as "Install" if not installed).
3. Click "Install". You will be prompted to select the installation folder and language (e.g., English, German, French, etc.). The default location is `%ProgramFiles (x86)%\Blizzard App\Warcraft III` (Windows) or `/Applications/Warcraft III` (Mac).
4. The app will download approximately 30 GB of data. The time depends on your internet speed (expect 30-60 minutes on a 100 Mbps connection).
5. After download, it will automatically install. The Battle.net app will show the "Play" button once complete.
#### 5. First Launch Setup
1. Click "Play" in Battle.net. The game will launch.
2. On first launch, you may be prompted to choose your graphics mode:
- Reforged HD (updated 3D models, lighting, UI)
- Classic (original Warcraft III look)
- You can also enable Classic UI along with HD models.
- This setting can be changed later in the Options > Graphics menu.
3. Accept the End User License Agreement (EULA) and Online Conduct Policy.
4. The game will then load the main menu. If you plan to play online, you must be connected to Battle.net.
5. It is recommended to review the Hotkeys settings under Options > Gameplay (choose Classic or Standard layout).
6. For multiplayer (Battle.net) or custom games (Warcraft III World Editor), no additional setup is required beyond being logged in.
Common Installation Errors and Fixes
| Error Message | Likely Cause | Solution |
|---|---|---|
| "We cannot install the game at this location" | Path contains special characters or is on a slow drive (e.g., external HDD). | Choose a different folder (avoid non-Latin characters). Ensure the drive has at least 35 GB free space. Use an internal SSD for best performance. |
| "Network access required" during install | Firewall/antivirus blocking Battle.net. | Add `Battle.net.exe` and `Warcraft III` folders to exception lists. Temporarily disable firewall/AV during download. |
| "Corrupted files detected" / Download gets stuck | Internet instability or corrupted cache. | Pause and resume the download. If that fails, close Battle.net, delete the `\.battle.net` and `\Blizzard App\Warcraft III` folders (inside `Program Files (x86)`), then restart the download. |
| "Error: BLZBNTAGT00000BB8" | Installation stopped due to insufficient permissions. | Run Battle.net as administrator (right-click > Run as administrator). Try installing to a different drive (e.g., D:\) that is not system-protected. |
| Game crashes on launch | Outdated graphics drivers, incompatibility with Windows version. | Update GPU drivers (NVIDIA/AMD/Intel). On Windows 11, ensure you have the latest updates. Try launching with Classic graphics first. You can force classic mode by editing `C:\Users\[Username]\Documents\Warcraft III\CustomKeys.txt` (advanced) – but easier to use the in-game option. |
| "You do not have permission to run this game" | Parental controls or region lock. | Check Blizzard account parental controls; ensure the account is allowed for the game’s content rating. If you bought a key from an unsupported region, contact support. |
- Check firewall: Windows Defender may block the game. Go to Settings > Update & Security > Windows Security > Firewall & network protection > Allow an app through firewall > Add `Warcraft III.exe` (located in `...\Warcraft III\x64_retail\`).
- Repair installation: In Battle.net app, click the gear icon next to the Play button > Scan and Repair. This checks and restores corrupted files.
- Reset network settings: Flush DNS (cmd: `ipconfig /flushdns`), restart router. For persistent download errors, use a wired connection.
- Outdated Battle.net app: Update the client automatically, but if stuck, download the latest installer from Blizzard.
- No console or mobile versions: Warcraft III is exclusive to PC (Windows & Mac). Do not trust any other ports.
- Classic vs Reforged: If you prefer the original looks, choose Classic graphics. The classic campaign experience is identical.
- Game ownership: If you own the original CD/DVD, you can still install via Battle.net using the product key. Keys from older versions will grant access to the Reforged client (without any extra charge if you already activated on your account).
- Mod and custom maps: All third-party content is downloaded automatically via the Battle.net client when joining custom games. You do not need separate installations.
- Mac considerations: Choose the correct installer (dmg). The game supports macOS 10.13 or newer. Note that Rosetta 2 is required for Apple Silicon (M1/M2) Macs – the Battle.net app and game may run under emulation, but performance is acceptable.
Post-Installation Verification
1. Check game files: In Battle.net, click the gear icon > Scan and Repair to ensure all files are intact.
2. Launch the game: Confirm you can see the main menu with both campaigns (Reign of Chaos & The Frozen Throne) playable. Click on Campaigns and verify both chapters are accessible (for single-player).
3. Test multiplayer: Go to Play Multiplayer > Battle.net > Join a Game. If you can see a list of games or create one, the online component works.
4. Check storage usage: After installation, right-click on the Warcraft III folder (e.g., `C:\Program Files (x86)\Blizzard App\Warcraft III`) > Properties. It should show around 27-30 GB used.
5. Graphics switching: Press Esc > Options > Graphics. Change from Reforged HD to Classic (or vice versa) to ensure both modes load correctly.
6. Audio and language: Verify voices and subtitles work. If you changed language, go back to Battle.net app > Settings > Game Settings > Warcraft III > Language and change if needed.
Important Notes
If you encounter persistent issues, refer to the official Blizzard Support page: [https://support.battle.net](https://support.battle.net) or open a ticket.
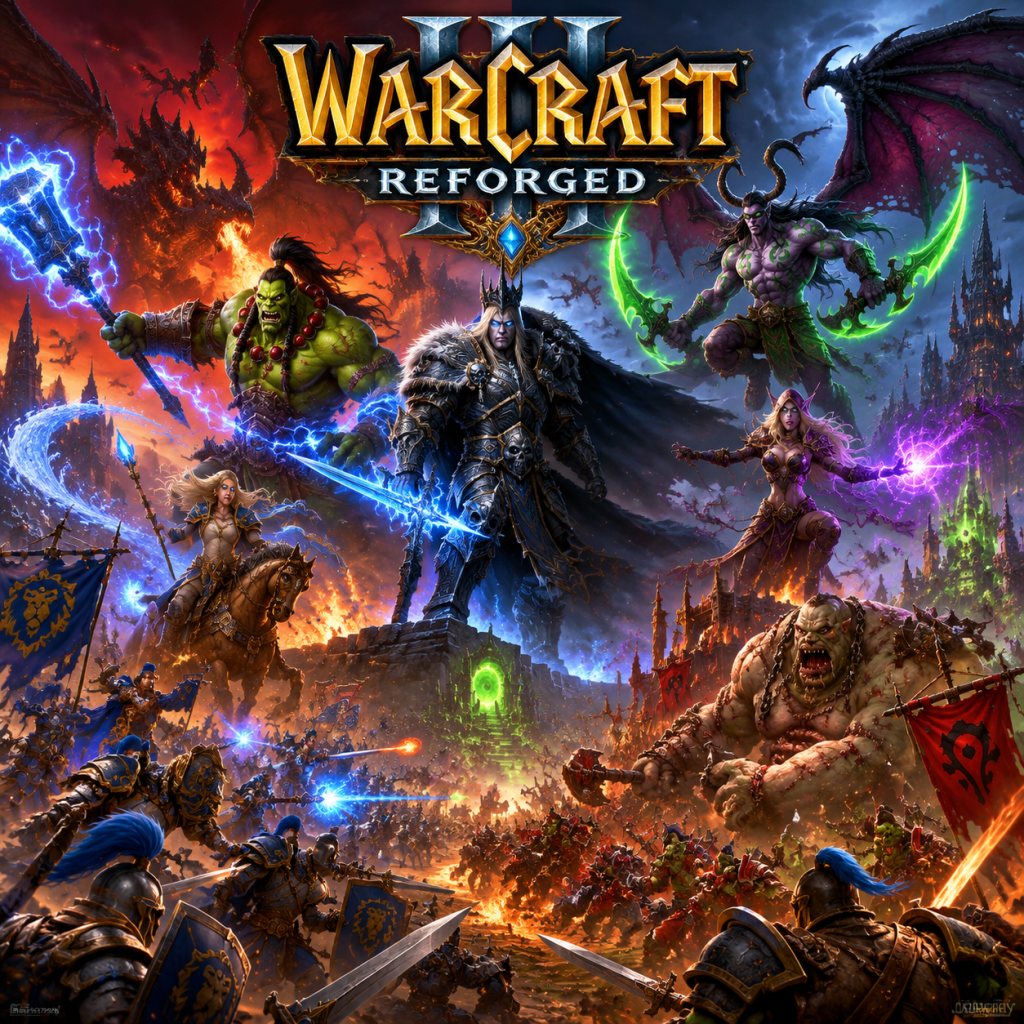
Game Introduction
Game Introduction: Warcraft III
Warcraft III is a landmark real-time strategy (RTS) game developed and published by Blizzard Entertainment. It originally launched in 2002 as Warcraft III: Reign of Chaos, followed by the expansion Warcraft III: The Frozen Throne in 2003. In 2020, Blizzard released Warcraft III: Reforged, a remastered version that updated the graphics, added modern features, and unified the classic and new editions on the Battle.net platform.
Platforms
- PC (Windows) – Primary platform.
- Mac (macOS) – Supported via Battle.net.
- No console releases – Available exclusively on desktop computers.
- The Scourge of Lordaeron – The human prince Arthas Menethil falls from grace as he pursues a cursed blade to save his kingdom, ultimately becoming the Lich King’s champion.
- The Invasion of Kalimdor – The orcish shaman Thrall leads his people to a new homeland across the sea, guided by visions.
- The Eternal Conflict – The night elf Tyrande Whisperwind and Malfurion Stormrage defend the World Tree from the demonic Burning Legion.
- The Legacy of the Damned (expansion) – The undead Sylvanas Windrunner breaks free from the Lich King’s control, while a new threat emerges from Northrend.
- Arthas Menethil – The tragic human prince turned Death Knight.
- Thrall – The wise orc warchief who leads his people to freedom.
- Jaina Proudmoore – A powerful human mage and diplomat.
- Tyrande Whisperwind – The fierce night elf High Priestess of Elune.
- Malfurion Stormrage – The first druid, guardian of nature.
- Illidan Stormrage – Malfurion’s brother, a demon-hunter with a tragic destiny.
- Sylvanas Windrunner – The undead Banshee Queen, a key figure in the expansion.
- The Lich King – The master of the Scourge, ultimately Arthas.
- RTS veterans who enjoy classic economy-based gameplay with modern refinements.
- Fantasy fans who appreciate rich lore and cinematic campaigns.
- Custom map enthusiasts – The game’s World Editor spawned genres like MOBAs (e.g., Defense of the Ancients), tower defense, and arena maps.
- Competitive players who seek balanced multiplayer with ladder rankings.
- Single-player Campaign – A story-driven experience (4 campaigns in Reign of Chaos, 4 extra in The Frozen Throne).
- Skirmish (vs. AI) – Play against computer opponents on various maps and difficulty levels.
- Multiplayer – Online PvP through Battle.net (ladder, custom games).
- Custom Games – User-created maps via the World Editor, including DotA (Defense of the Ancients), Enfos Team Survival, Warlock, and thousands more.
- Co-op – In Reforged, a limited co-op mode exists, but primarily via custom maps.
- Offline – All single-player content (campaign, skirmish vs. AI) works without internet after initial authentication.
- Online – Requires a Battle.net account for multiplayer and custom game downloads. Reforged added improved matchmaking, ladder, and chat.
- Warcraft III: The Frozen Throne (2003) – The official expansion. Adds:
Story Overview
Set in the fantasy world of Azeroth, Warcraft III’s narrative serves as the direct prequel to World of Warcraft. The story unfolds across four interconnected campaigns:
Setting
Azeroth is a high-fantasy continent divided into regions like the plague-ravaged Lordaeron, the lush Kalimdor, the mysterious Northrend (ice continent), and the shattered Outland (a remnant of the orc homeworld). The world is inhabited by four main races: Humans, Orcs, Night Elves, and Undead. Each race has its own unique units, heroes, and playstyle.
Main Characters
Core Appeal
Warcraft III stands out for its deep storytelling, memorable characters, and a perfect blend of base-building, resource management, and tactical combat. Its hero system (units that level up and wield powerful abilities) adds RPG elements to the RTS formula, making each battle feel personal and narrative-driven.
Target Audience
Game Modes
Online/Offline Support
DLC/Expansion Overview
- New units and heroes (e.g., Blood Elf, Naga, Draenei)
- New neutral buildings (e.g., Mercenary Camp, Goblin Shop)
- Map editor enhancements and more custom game options
- All of this content is included in the Reforged version.
What Makes Warcraft III Unique?
1. Hero Units – Each hero has a signature ability tree, ultimate spell, and can carry items. This RPG layer fundamentally distinguishes it from pure RTS games like StarCraft.
2. World Editor – A powerful tool that allowed players to create entirely new game genres, most famously the MOBA (starting with Defense of the Ancients). The editor’s flexibility kept the game alive for decades.
3. Narrative Depth – The story is told through in-game cutscenes, voice acting, and campaign scripting that rivals many single-player RPGs.
4. Four Distinct Races – Each race plays completely differently: Humans rely on magic and versatility, Orcs on brute force and shamanistic buffs, Night Elves on stealth and nature synergy, and Undead on corruption and resurrection.
5. Reforged Edition – The 2020 remaster brought HD graphics, updated UI, and modern matchmaking while preserving the classic gameplay mechanics. However, it also faced criticism for missing promised features and technical issues, which have been partially addressed through patches.
Whether you are revisiting a childhood classic or diving into the lore that birthed World of Warcraft, Warcraft III remains a cornerstone of the RTS genre, celebrated for its storytelling, modding community, and timeless gameplay.
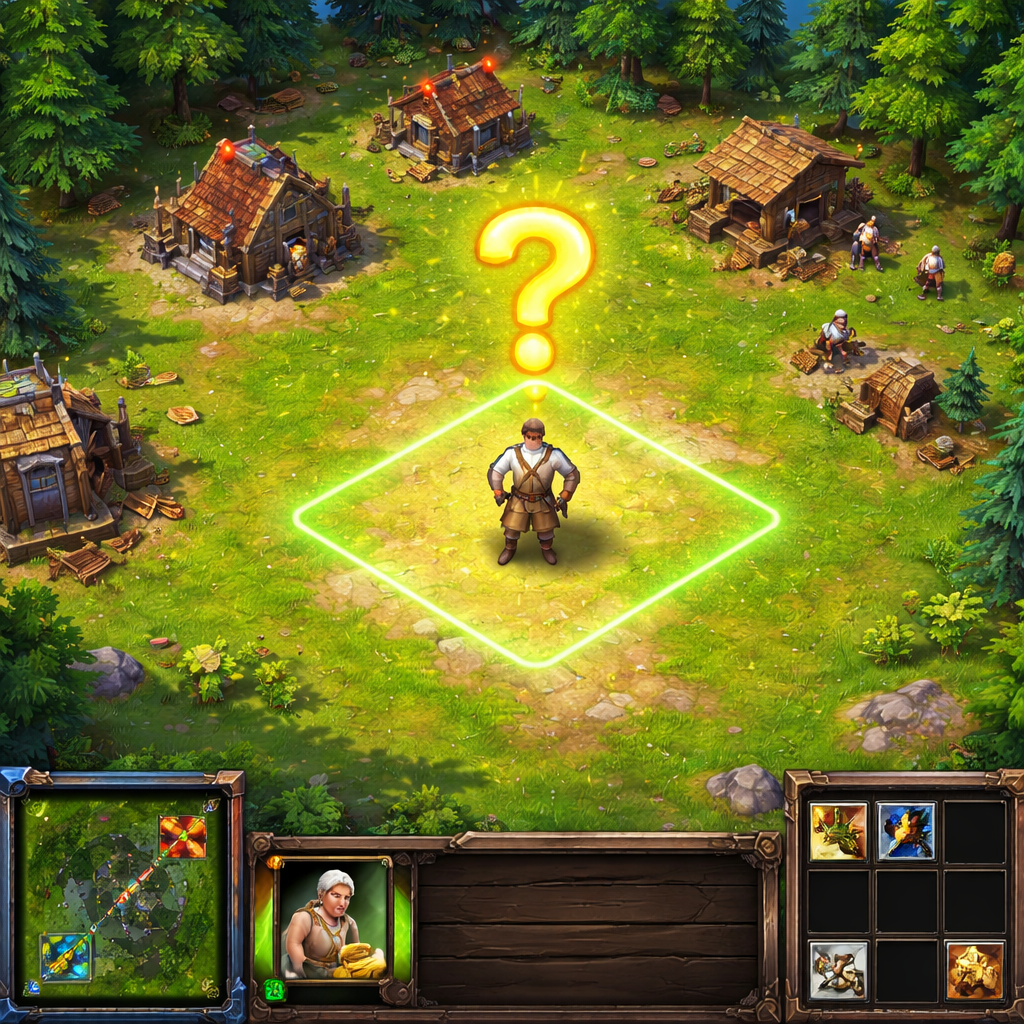
Getting Started
Getting Started with Warcraft III: A Beginner's Guide
Welcome to Warcraft III! This guide is designed for brand-new players who have just installed the game (Reforged or Classic) and want to know exactly what to do in the first hour, how to control the game, and how to avoid common mistakes that frustrate newcomers.
---
First Hour Walkthrough (Campaign Start)
Most beginners should start with the single-player campaign to learn basics at your own pace. Here's a step-by-step plan for your first hour:
1. Launch Warcraft III from Battle.net. Choose "Campaign" from the main menu.
2. Select the Prologue campaign: "The Defense of the Ancients" (or just start "Reign of Chaos" if Prologue isn't there). This is the gentlest introduction.
3. Watch the cinematic – it sets up the story. Press Esc to skip if you prefer, but the lore adds context.
4. First mission: "The Defense of Strahnbrad" – You control a small base and must destroy an enemy camp. The game will give you on-screen tutorial tips.
5. Build what they tell you: Follow the quest instructions. Usually you start with a Town Hall, a few Peasants (Humans), gold mine, and lumber.
6. Send your initial Peasants to cut trees and mine gold. Build a Barracks, then train Footmen.
7. Attack the enemy: Select your army, right-click on enemy units or buildings. The mission ends when enemy structures are destroyed.
8. Repeat for mission 2: Teaches more advanced units (Riflemen) and hero usage.
Pro Tip: If you get stuck, press F10 > Objectives to see your current mission goals. You can also reduce game speed from the menu (F10 > Game Speed > Slow) if you feel overwhelmed.
---
Character Creation
Warcraft III is a real-time strategy game – there is no single character to create. You control an entire army and base. However, you will gain Heroes (unique units with abilities) as you progress through the campaign. Heroes level up, learn spells, and carry items. Think of them as your 'character' in RTS terms. You can name them? Not in standard gameplay – they have preset names. But in custom games, you might be able to choose. For the guide, just know: no character creation exists.
---
Controls on All Platforms
Warcraft III is PC-only (Windows and macOS). There is no console version. The game is played entirely with mouse and keyboard. Here's a breakdown:
#### Essential Mouse Controls
- Left-click: Select unit, building, or UI element.
- Right-click: Move unit, attack, collect resources, interact with friendly buildings.
- Drag left-click: Select multiple units (box selection).
- Double-click on a unit: Select all units of that type on screen.
- Scroll wheel: Zoom in/out (hold Ctrl + scroll for smoother zoom).
- Middle mouse button: Scroll the camera (pan).
#### Keyboard Shortcuts (Standard – can be customized)
| Action | Key | Notes |
|---|---|---|
| Attack | A + left-click ground or enemy | Orders units to move-attack; excellent for creeping. |
| Stop | S | Halt current action. |
| Hold Position | H | Unit stays still and attacks enemies in range. |
| Patrol | P | Unit walks a route and attacks enemies along the way. |
| Move | M? Actually movement is right-click, but you can use M for move without fighting. | Use right-click normally. |
| Select all army | F2 (default) | Selects all combat units on screen. |
| Select Hero | F1 | Quick-select your main hero. |
| Control groups | Ctrl + 1-9 to assign; press 1-9 to select. | Critical for advanced play. |
| Build common buildings | Hotkeys per race (e.g., B for Build, then A for Altar) | Hover over button to see tooltip with hotkey. |
| Minimal UI toggle | Ctrl + Shift + F | Hides UI for screenshots. |
| Open game menu | Escape or F10 | Pause, save, quit. |
| Camera movement | Arrow keys or WASD (if configured) | Reposition view. |
---
UI Overview
The game screen has several critical elements. Understanding them prevents confusion.
- Top-Left (Portrait): Displays currently selected unit/building. Shows health, mana, and abilities.
- Top-Center: Minimap: Green dots – friendly units; Red dots – enemies; Yellow – neutral. Left-click on minimap to jump camera there. Right-click to give a move order.
- Top-Right: Menu Buttons: Options, Quests, Diplomacy (alliances), Chat.
- Bottom-Left: Command Card: Shows available actions for selected unit. Build, train, attack, move, abilities, etc. Buttons have hotkeys in brackets.
- Bottom-Center: Unit/Building Info: Health bar, mana, attack damage, armor, etc.
- Bottom-Right: Resource Display: Gold, Lumber, Food used/max, Upkeep level.
- Around Unit Portraits: If you have multiple units selected, their portraits show in a row across the bottom of the screen. You can click on a portrait to select just that unit, or Shift+click to add/remove.
- Bind your hotkeys (Esc > Hotkey Setup) – many beginners ignore this but it doubles your speed.
- Use control groups – assign your Hero to 1, army to 2, production buildings to 3-5. Practice using number keys.
- Always keep producing workers – idle Town Hall = wasted income.
- Scout early and often – knowledge of enemy composition and expansions wins games.
- Use A-move for attack commands, not right-click.
- Save replays (enabled by default) – watch them to see your mistakes.
- Play the tutorial if available (Reforged has a tutorial in the menu).
- Ignoring upkeep – building 100 food worth of workers early will cripple your income.
- Not researching upgrades – upgrades for attack/armor are huge power spikes. Build a workshop/lumber mill and get +1 attack early.
- Forgetting to defend your base – send a unit to patrol your perimeter, or place a watch tower.
- Over-macroing or over-microing – balance between base management and army control. If you lose focus, pause (in single player) or retreat.
- Using right-click to attack – it makes units move into enemy lines without fighting; they may ignore attackers.
- Spamming buildings without workers – never stop training workers until you hit a comfortable count (e.g., 5-7 on gold, 2-3 on lumber for early game).
- Ignoring Hero items – collect dropped items and equip them (right-click item to equip). Health potions, mana potions, and scrolls of protection are game-changers.
Important UI nuance: Upkeep indicator – if your Food usage exceeds certain thresholds, you pay more gold tax. Keep food under 50 for minimal tax (Low Upkeep). Between 50-80 is Medium Upkeep (30% tax), above 80 is High Upkeep (60% tax). This is why spamming units can hurt your economy.
---
Essential Early Objectives
When you start any game mode (campaign or skirmish), your first minutes should follow a consistent pattern:
1. Produce Peasants/Wisps/Acolytes/Peons (depending on race) continuously until you have about 5-7 on gold and 2-3 on lumber. Your Town Hall should be constantly training workers.
2. Scout immediately – send one worker to explore nearby. Identify enemy base location and expansion gold mines.
3. Build a Barracks (or equivalent) as soon as you have 60 gold – this lets you train basic fighters for defense and creeping.
4. Build a Farm (or equivalent) to increase Food supply – you'll need food to train units.
5. Hero Altar – build an Altar of Heroes (Human/Orc/Undead) or Gauntlet (Night Elf) to summon your first Hero. Heroes are essential for experience and powerful spells.
6. Creep – use your Hero and a few units to kill neutral monsters (green dots on minimap) for experience, gold, and item drops.
7. Expand – capture a second gold mine and build a second Town Hall (called an expansion). This doubles your income but requires defense.
In campaign missions, these objectives may be simplified; just follow quest instructions.
---
What to Do First and What to Avoid
#### ✅ Do First
#### ❌ Avoid
---
Early Resource Priorities
| Resource | Priority | Explanation |
|---|
| Lumber | High | Used for buildings, some units, and upgrades. Get 2-3 workers on lumber early, then add more when building expansions.
| Food | Medium | Cap on total units. Build farms (or equivalent) steadily; don't overbuild or underbuild. Aim for ~40-50 food in early game.
| Hero Experience | Medium-High | Creeping gives your Hero levels. A level 2 Hero is much stronger than level 1. Prioritize clearing neutral camps near your base.
| Upgrades | Medium | Attack/armor upgrades cost gold and lumber but pay off in every fight. Start the first upgrade after you have a stable economy (~3-5 minutes).
Tip: Your first 200 gold should go toward a Hero Altar (180 gold) and a Barracks (60 gold). Then save for a second gold mine expansion around 5 minutes.
---
Common Beginner Mistakes & How to Fix Them
1. Idle workers – Check your base every 10 seconds. Fix: Use 'idle worker' hotkey (default: `.` (period)) to jump to idle workers, then right-click them on a resource.
2. Not using control groups – You spend precious seconds selecting units. Fix: Press Ctrl+1 to assign Hero, Ctrl+2 for army, Ctrl+3 for Barracks. Then press 1,2,3 to select them.
3. Forgetting to produce units – Your buildings sit idle while you micro battles. Fix: Assign production buildings to a control group and regularly tap that key to queue units.
4. Bad scouting – Unknown enemy strategy leads to unfair fights. Fix: Send a worker to each ramp/path. Use a flying unit (e.g. Flying Machine for Humans) for constant vision.
5. Ignoring Hero spells – New players only attack with Hero, not using spells. Fix: Press Q, W, E, R for first four spell slots. Heal, summon, or nuke enemies.
6. Not adapting build order – Doing same thing every game loses. Fix: Learn 2-3 build orders per race (e.g., for Humans: fast expansion or footman harass).
7. Overfocus on one thing – You win by doing many small things well, not one big thing. Fix: Practice multitasking: every 5 seconds glance at minimap and base.
---
Day-One Checklist
Complete these tasks in your first play session (about 1-2 hours):
- [ ] Play first 3 campaign missions (Prologue or Chapter 1-3 of Reign of Chaos).
- [ ] Experiment with all 4 races – play at least one skirmish vs AI on Easy with each race (Humans, Orcs, Undead, Night Elves).
- [ ] Memorize the essential hotkeys for your favorite race: e.g., for Humans: B for Build, A for Altar, B for Barracks, F for Farm. (Check tooltips for exact hotkeys – they vary by race.)
- [ ] Set up control groups: Hero (1), main army (2), one production building (3).
- [ ] Learn to A-move – practice in a custom game with only Footmen vs Creeps.
- [ ] Watch a 5-minute beginner video (YouTube: “Warcraft III Beginner Basics”).
- [ ] Adjust your game settings: turn up game speed to Normal (or Fast if comfortable), enable health bars (Alt+Z to toggle), and set mouse sensitivity.
- [ ] Play a vs AI game on Normal difficulty and win without cheating (no speed adjusting).
- [ ] Understand upkeep: check your food count and see how much tax you pay.
- [ ] Save a replay of your best game and rewatch at 2x speed – note 3 mistakes you made.
- Join the community: r/warcraft3 on Reddit, Discord servers, or watch pro streams (Grubby, Happy, Tod) to see efficient play.
- Don't be afraid of Custom Games: Try Tower Defense or Survival maps to improve micro and learn unit interactions.
- Practice build orders against Easy AI until you can execute them with 90% efficiency (no idle time, correct timing).
- Play the campaign fully – it teaches all basic mechanics and gives context for unit abilities.
- Gradually increase AI difficulty – once you beat Normal AI consistently, try Hard (which gives AI 50% more gold).
This checklist ensures you cover the fundamentals. By the end of day one, you should feel comfortable navigating the interface, building a basic army, and attacking effectively.
---
Final Tips for Your First Week
Welcome to Azeroth! Now go forge your legend.
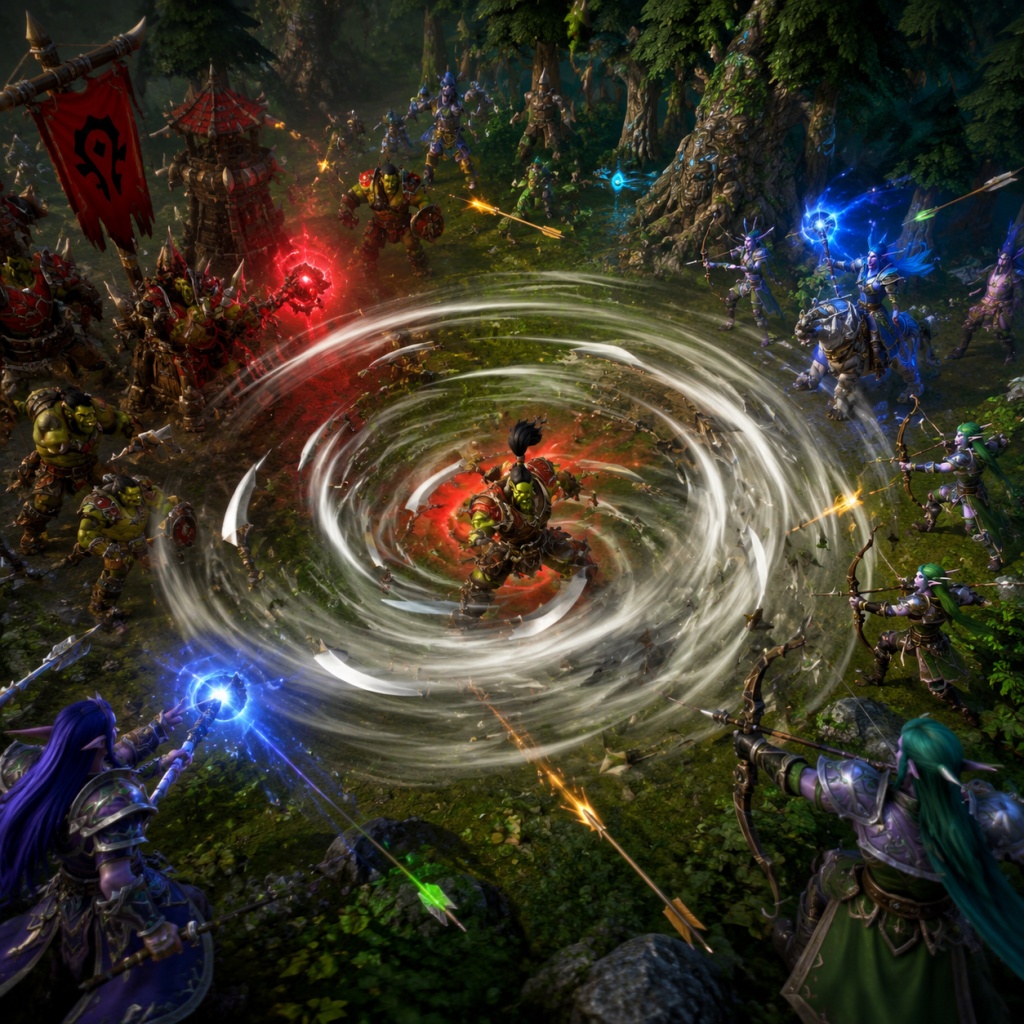
Core Gameplay
Core Gameplay Overview
Warcraft III is a real-time strategy (RTS) game where you command a faction (Human, Orc, Night Elf, Undead) in campaigns, custom scenarios, or competitive melee matches. The core gameplay loop revolves around resource gathering → base building → army production → map control → combat. You simultaneously manage economy, technology, heroes, and military tactics. The game is played on a 2D isometric map with fog of war, requiring constant scouting and adaptation.
---
Progression Tiers
Early Game (First 5–10 Minutes of a Match or Campaign Mission)
Goal: Establish a functional economy and secure your immediate surroundings.
#### Main Gameplay Loop
1. Resource Gathering: Start with a Town Hall (or equivalent) and 5 Peasants (Human) or similar workers. Send them to mine gold (usually the nearest Gold Mine within your base) and chop lumber from trees. Prioritize gold first, as it’s the primary currency for buildings and units.
2. Base Building: Queue construction of a Barracks (or equivalent unit-producing structure) as soon as you have 200 gold and 50 lumber. Immediately assign a worker to build it.
3. Scout: Send a worker or starting unit (e.g., Hero or Footman) to explore nearby creep camps and potential expansion sites. Uncover your opponent’s location in melee.
4. First Units: Produce a few basic units (Footmen, Grunts, Archers, Ghouls) to defend against early harassment or to creep.
5. Hero Recruitment: Build an Altar and hire your first Hero (e.g., Archmage, Blade Master, Demon Hunter, Death Knight). The Hero will accompany your army and level up by killing creeps.
#### Combat & Interaction
- Creep Camps: Neutral monsters (e.g., Wolves, Ogres) hold experience, gold, and sometimes items. Kill them to level your Hero and gather permanent bonuses. Always lure creeps away from their camp to avoid pulling multiple groups.
- Harassment: Your opponent may send a Hero or a few units to interfere with your woodline or gold mine. Keep a few units on guard and use your Hero’s spells (e.g., Blizzard, Shockwave, Frost Nova) to scare off attackers.
- Quests (Campaign): Campaign missions often have specific early objectives like “Build 2 Farms” or “Gather 1000 Gold” before triggering a scripted event. Follow the quest log (F9 or ? icon) closely.
- Upkeep: When your total supply (Food) exceeds 50, you enter Low Upkeep (70% gold/lumber income). In the early game, keep supply below 50 to maximize income for teching or expanding.
- Gold Mine: One Gold Mine supports 3–5 workers efficiently. Overcrowding reduces gold per worker. Expand to a second Gold Mine when the first depletes (usually mid-game).
- Lumber: Each lumber mill (or equivalent) allows workers to drop off wood. Build multiple lumber mills later. Chop the nearest trees first.
- Hero Leveling: Your starting Hero earns experience from creep kills and enemy unit kills. Early game, focus on green- or blue-level creeps (weak) to get to Level 2 quickly. Unlock a new ability (e.g., Water Elemental, Mirror Image, Entangling Roots) at Level 1 and Level 3.
- Items: Creeps drop Permanent (e.g., Ring of Protection, Sobi Mask) or Charged (e.g., Scroll of Healing, Wand of Mana) items. Collect them on your Hero to improve survivability or damage.
- Build 5 Peasants, send 3 to gold, 1 to lumber, 1 to build a Barracks. After Barracks, build an Altar. Train Footmen while scouting with the Peasant. The Archmage (first Hero) kills nearby Wolves, gains level 2, picks Brilliance Aura. By 5 minutes, you have 8 Peasants, 1 Archmage, and 2 Footmen.
- Hero Synergy: Two Heroes work together: one damage dealer, one support. Example: Archmage (summon Water Elemental) + Mountain King (Storm Bolt stun) for crowd control. In PvP, coordinate spell combos (e.g., Entangling Roots + Lich’s Frost Nova).
- Harassment & Counter: Use fast units to kill enemy workers at expansions or woodlines. Build Watch Towers or Guard Towers at key chokepoints to deter raids.
- Creep Camps: Green (easy) camps are now too weak; move to Orange and Red camps (higher risk, better rewards). Clear camps that drop Tomes (+ stats) or high-level items (e.g., Claws of Attack +6, Orb of Fire).
- Upkeep: You likely exceed 50 supply (Low Upkeep), and may reach 80 (High Upkeep, 60% income) if you train a large army. Plan expansions to offset the income penalty. A second fully operational Gold Mine can sustain a tier-2 army.
- Trade: Sell surplus lumber (if playing Undead with Ghouls) or buy items from Mercenary Camps (neutral) for gold. Mercenaries (e.g., Ogre Mage, Kobold Geomancer) can fill gaps in your army.
- Second Hero: Recruit from the Altar or from a Tavern (neutral gathering point). Tavern heroes (e.g., Naga Sea Witch, Dark Ranger) add unique flexibility.
- Hero Levels: Your main Hero should be Level 4–6 by mid-game, unlocking powerful Ultimate spells (e.g., Mass Teleport, Avatar, Metamorphosis, Animate Dead). Use utlimates in decisive battles.
- Items: Equip both heroes with stat-boosting items. Use Dust of Appearance to reveal invisible units (e.g., from Shadowmeld or Wind Walk).
- Upgrade Stronghold to Fortress. Build Beastiary and Spirit Lodge. Train Raiders (for ensnare) and Shaman (for Bloodlust). Recruit Shadow Hunter as second hero. Clear a red camp to get a Tome of Strength +2. Expand to a second gold mine with Tower support.
- Hero Power Spikes: At levels 8–10, heroes are extremely strong. Use ultimates at the start of a fight for maximum impact. Keep heroes alive with invulnerability potions or scrolls of protection.
- Dispel & Magic: Many late-game units have powerful abilities (e.g., Banshee’s Possession, Spell Breaker’s Spell Steal). React quickly with dispel to neutralize hexes or summoned creatures.
- Bases & Counter-attacks: While you assault the enemy, they may send a small force to your expansion. Leave a handful of units (e.g., towers with upgraded fortifications) to delay. Use teleportation (Human’s Scroll of Town Portal) to defend if needed.
- Upkeep: Expect High Upkeep (80+ supply). Your gold mines may deplete – sell excess lumber or mercenaries to fund the war. If playing Undead, use Blight to regenerate health and mana while sieging.
- Selling Items: You can sell unwanted items to a Goblin Merchant for 50% gold. This is useful to free inventory space for better drops.
- Hero Levels: Your main Hero should be Level 8–10 (cap). All three ability trees are maxed. The second Hero is Level 5–7. A third Hero (optional) can be recruited for specific utility (e.g., Paladin for healing aura).
- Items: Equip your main Hero with high-tier permanent items like Orb of Lightning, Amulet of Spell Shield, Mask of Death, and Tomes that boost primary stats. Use charges wisely.
- Build Chimaera Roost, produce 3 Chimaeras (anti-building). Upgraded Druids of the Claw in Bear form tank. Keep a Priestess of the Moon for Trueshot Aura. Attack the enemy base: Chimaeras target the Town Hall while Dryads dispel curses.
- Higher Difficulty: Replay campaign on Hard or Insane to face tougher AI, faster tech, and fewer resources. Many missions change enemy composition and timing.
- Bonus Maps & Secret Levels: In Reign of Chaos and The Frozen Throne, certain actions unlock secret missions (e.g., “The Culling” secret level, “The Rise of the Lich King” bonus). These offer unique challenges and lore.
- Custom Games: The World Editor allows infinite community maps: Tower Defense, Hero Arena, Defense of the Ancients (DotA) predecessor, Risk, and many RPG-style maps. This is where most players spend their time.
- Ladder & Tournaments: Play ranked 1v1 or 2v2 on Battle.net. The meta evolves with patches. Popular maps (e.g., Lost Temple, Echo Isles, Turtle Rock) have specific strategies for each race.
- Key Concepts:
- High-level Play: Watch replays of pros (e.g., Grubby, Moon, Happy, TH000) to learn timings, attack patterns, and map-specific tactics.
- Item Carryover: Some campaign missions let you transfer items and heroes to the next chapter. Use this to build powerful heroes early in The Frozen Throne’s Orc campaign.
- Artifacts: Collect campaign-specific artifacts (e.g., Crown of Kings, Horn of the Clouds) that provide permanent bonuses in later missions.
- Insane AI: 1v3 or 1v4 against Insane computer opponents. This forces flawless macro and aggressive micro.
- Speedrunning: Complete campaigns in minimum real time. Requires memorizing mission triggers and optimal unit paths.
- Achievements (Reforged): Unlock achievements for completing campaigns on Hard, winning 1v1 matches, or specific feats like “No Town Portal Used” in a mission.
#### Economy
#### Character / Build Growth (Heroes)
#### Example (Human Match):
---
Mid Game (10–20 Minutes, Tech Tier 2)
Goal: Expand your economy, tech to Tier 2 for advanced units and structures, and contest map objectives.
#### Main Gameplay Loop
1. Tech Upgrade: Upgrade your Town Hall to Keep (Human) or equivalent. This unlocks Tier 2 structures: Blacksmith (upgrades), Workshop (siege), Arcane Sanctum (casters), etc.
2. Expand: Build a new Town Hall near a second Gold Mine (often with creeps guarding it). Clear the expansion site with your Hero and early army. Establish workers there to double your gold income.
3. Army Composition: Transition from basic units to Tier 2 units like Riflemen (Human), Raiders (Orc), Huntresses (Night Elf), or Abominations (Undead). Add a second Hero (e.g., Mountain King, Shadow Hunter, Keeper of the Grove, Lich).
4. Map Control: Use scouting units (e.g., Hawks, Wolves, Owl) or summons to reveal creep camps, expansions, and enemy movements. Clear neutral camps for permanent items, gold, and to deny your opponent resources.
5. Quests & Objectives: In campaign, mid-game missions often involve defending a point (e.g., “Defend the Village for 15 minutes”) or destroying a specific enemy structure. Focus on completing the primary objective while managing tech.
#### Combat & Interaction
#### Economy
#### Character / Build Growth
#### Example (Orc Match):
---
Late Game (20–30+ Minutes, Tech Tier 3)
Goal: Maximize hero levels, field a high-tech army with siege and dispel, and destroy the enemy base.
#### Main Gameplay Loop
1. Ultimate Tech: Upgrade to Castle (or equivalent) to unlock Tier 3 structures: Gryphon Aviary (Human), Tauren Totem (Orc), Chimaera Roost (Night Elf), Boneyard (Undead). Build these to produce heavy units (Gryphons, Tauren, Chimaeras, Frost Wyrms).
2. Army Refinement: Your army now consists of a front line (Knights, Tauren, Bears, Abominations) + ranged damage dealers (Riflemen, Headhunters, Archers, Fiends) + support (Priests, Shaman, Druids, Necromancers) + siege (Mortar Teams, Demolishers, Glaive Throwers, Meat Wagons). Aim for a balanced composition with at least one dispel unit (Priest’s Dispel Magic, Shaman’s Purge, Dryad’s Abolish Magic).
3. Map Domination: With a large army, clear all neutral camps, claim all expansions (up to 3–4 bases), and establish forward outposts with Towers and shops (e.g., Goblin Laboratory). Control the center of the map.
4. Final Push: In campaign, the final mission often involves assaulting a heavily fortified enemy stronghold. In melee, you gather your army and destroy the enemy's main base. Always have a way to break through defenses: siege units target structures first, while heroes use spells to wipe out defenders.
#### Combat & Interaction
#### Economy
#### Character / Build Growth
#### Example (Night Elf Late Game):
---
Endgame (Post-Campaign & Competitive)
Goal: Master the game’s depth through replayability on higher difficulties, custom maps, or ladder matches.
#### Content After Campaign
#### Competitive (Melee) Endgame
- Micro vs. Macro: Perfecting unit control (positioning, stutter-step, spell casting) while maintaining economy and building upgrades.
- Scouting: Use invisible heroes or summons (Feral Spirit, Water Elemental) to scout opponent’s build order and react.
- Counter-builds: Adjust your composition based on opponent’s units (e.g., if they mass air, build anti-air like Huntresses or Crypt Fiends with web).
#### Character/Build Growth (Persistence in Campaign)
#### Endgame Challenges
---
Summary Table of Progression Tiers
| Tier | Time (Typical) | Tech Level | Hero Levels | Army Size (Supply) | Key Objectives |
|---|---|---|---|---|---|
| Early Game | 0–10 min | Tier 1 | 1–3 | 10–30 | Secure base, scout, creep, first expansion |
| Mid Game | 10–20 min | Tier 2 | 4–7 | 30–60 | Tech, expand, contest map, second hero |
| Late Game | 20–40 min | Tier 3 | 8–10 | 60–100 | Max heroes, heavy units, destroy enemy |
| Endgame | Post-campaign / Ongoing | N/A | Maxed | Variable | Replay, ladder, customs, mastery |
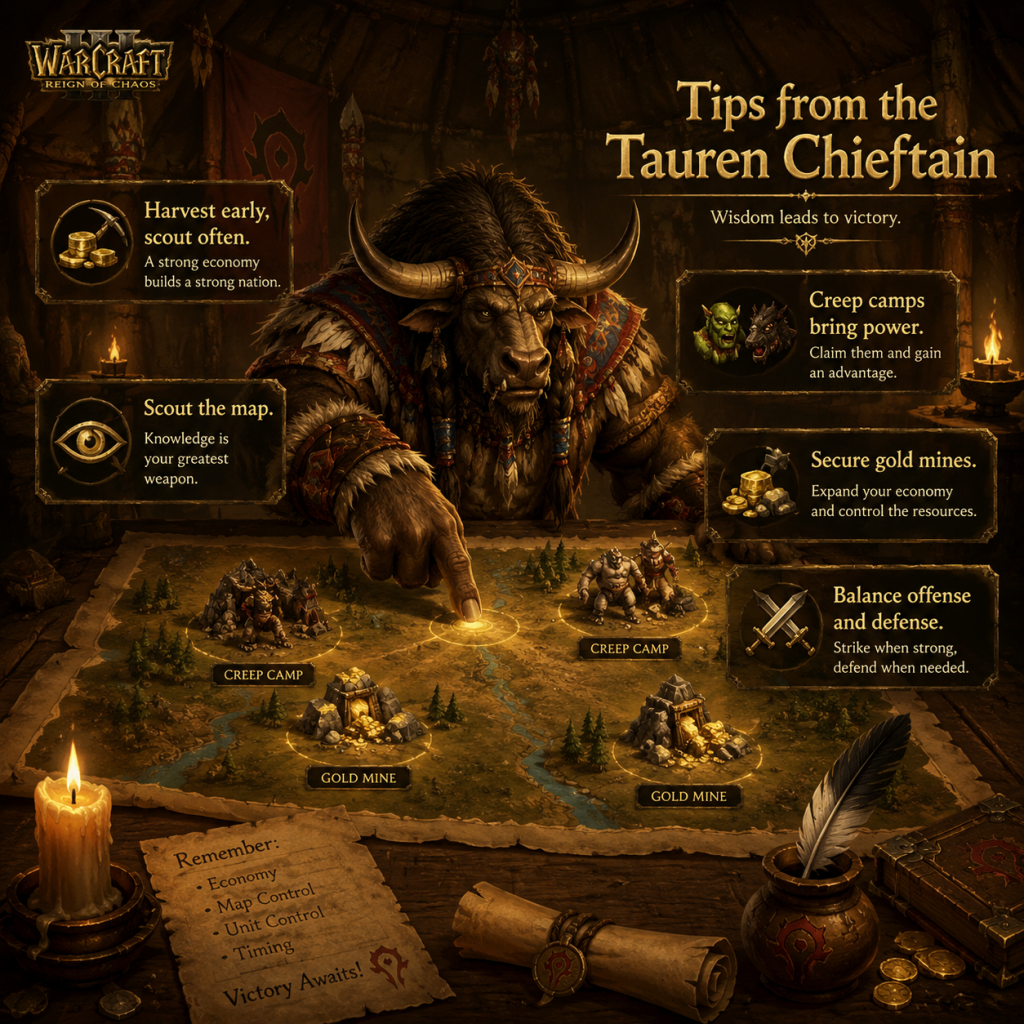
Game Tips
Game Tips for Warcraft III: From Beginner to Advanced
This guide covers essential tips for Warcraft III (both Classic and Reforged) across multiple categories. Tips are grouped by aspect of gameplay, with explanations and strategic analysis.
Beginner Tips (Fundamentals)
- Always train Peasants/Workers continuously – Your Town Hall (or equivalent) should never be idle early game. Queue workers one at a time or use shift-click. Reason: Workers gather resources and build structures; any idle production time delays your economy and army.
- Hotkey your Town Hall to 5 or 6 – Select your main building and press Ctrl+5 (or any number). Then pressing 5 selects it instantly, allowing you to queue workers without moving the screen. This saves precious seconds in early macro.
- Scout early, scout often – By 1:30-2:00 minutes, send a Peasant or Scout (e.g., Wisp, Ghoul) to your opponent's base. Knowing their race and opening (e.g., Fiends vs. Grunts) dictates your counter-build. If you don't scout, you might build the wrong tier 1 units.
- Use A-move (Attack-Move) for melee units – When engaging, press A then left-click on the ground. Units will attack anything on the way, then converge on the target. This prevents them from walking past enemies to reach a clicked unit, reducing idle time.
- Keep your Hero alive at all costs – Heroes gain experience and level up, unlocking powerful spells. Dying gives the enemy gold and XP. When a Hero’s health is low, use a Town Portal scroll (buy from Goblin Merchant) or run them behind your army.
- Build order matters – For each race, learn a standard opener (e.g., Human: Altar->Farm->Barracks->Farm, Orc: Altar->Barracks, Night Elf: Altar->Moon Well, Undead: Crypt->Graveyard->Ziggurat). Deviation without reason often weakens your early game.
- Focus fire high-value targets – Select all ranged units, right-click an enemy Hero or a powerful caster (e.g., Death Knight, Blademaster). Key: Bind “attack” to a hotkey (default A) and click target. Avoid letting units auto-attack scattered targets.
- Stutter-step (orb-walk) with ranged units – Issue an attack command, then immediately move after the projectile fires. This allows hit-and-run against melee. Advanced: Use the Stop (S) key to cancel backswing animation if your unit has low attack cooldown.
- Use unit formations – Melee in front, ranged behind, Heroes in the middle. To set: Select all, press and drag a formation rectangle. In combat, avoid clumping vs. area-of-effect spells (e.g., Blizzard, Flame Strike). Spread units via move commands.
- Save units with Alt+click – If a unit is low HP, hold Alt and click its portrait to select it alone, then move it back. Alternatively, use tab to cycle through wounded units. This preserves army strength.
- Creep camps with a tank – Use a Hero or a high-HP unit to soak damage while ranged units attack. Pull creeps one by one if possible rather than aggroing the whole camp. Learn which camps give powerful items (e.g., green power-ups).
- Use invulnerability potions and items wisely – Heroes can use items from inventory. A Health Potion (from Goblin Merchant) heals 250 HP instantly. Use during combat, not after since enemies may move away.
- Wards and summons – Orc’s Far Seer can summon a Feral Spirit to scout. Night Elf’s Warden can use Shadow Strike to reveal invisible units. Undead’s Obsidian Statue can spawn a Shade for stealth scouting. Humans can use a Priest’s Invisibility on a peasant.
- Watch towers and vision – Build Watch Towers (Human Guard Tower, Orc Watch Tower, Night Elf Moon Well as forward scouting post) at expansion locations or near enemy base. They provide vision and can be used to detect incoming attacks.
- Drops and expansions – Early in the game, send a worker to scout expansion gold mines. If you secure an early expansion, you’ll have a huge economy advantage. Conversely, if you see the enemy expanding, you can attack before they are established.
- Read the minimap constantly – Keep your eye on the minimap for red dots (enemy units). If you see a flash of red, zoom in to identify the threat. Also watch for green dots (creeps) – if they disappear near your base, an enemy is creeping.
- Gold collection optimization – Each worker carries max 10 gold per trip. With 5-7 workers on a gold mine, they’ll wait in line. For optimal gold rate: stop at 5 workers on gold for the first mine; add more only after expanding. For lumber, 4-6 workers initially, more later.
- Lumber upgrade – Early build a Lumber Mill (Human), War Mill (Orc), Ancient of Lore (Night Elf), or Graveyard (Undead) to unlock wood upgrades (e.g., Improved Lumbering). Each upgrade increases wood harvest by ~25%, critical for midgame buildings.
- Sell excess items – After looting a creep camp, if you get an item you don’t need, sell it at a Goblin Merchant for gold. This can fund tech or units.
- Rally points – Set rally point on your gold mine (or lumber camp) so new workers automatically start gathering. Rally for military units: shift+right-click on the ground near your base or on a specific creep camp for experience.
- Double expand only when safe – Expanding to a second gold mine is risky if the enemy attacks early. Build defensive structures (towers, Moon Wells) before committing workers. Undead can use a Nerubian Tower for creep blocking.
- Tier 1 vs. Tier 2 – In most matchups, you want to tech to Tier 2 quickly for Heroes (e.g., Orc’s Shadow Hunter, Human’s Mountain King) and units (Sorceress, Wyverns). But if your opponent is aggressive (e.g., Human rush), stay Tier 1 for more units to defend.
- Hero selection synergy – Choose a starting Hero that complements your strategy: Archmage (Human) for Blizzard and Water Elemental; Blademaster (Orc) for harassment; Death Knight (Undead) for healing and Death Coil; Demon Hunter (Night Elf) for anti-caster with Mana Burn.
- Fast expansion build examples – Human: Altar, Farm, Barracks, Farm, then build a second Town Hall near a gold mine. Orc: Altar, Barracks, then send a Peon to build a Burrow at expo. Unit composition: mix of Footmen and Riflemen vs. Grunts and Raiders.
- Unit counters – Melee vs. ranged: use melee to absorb damage, ranged to deal damage. Spell casters (Sorceress, Banshee) counter heroes with polymorph or possession. Air units (Gryphon Rider, Frost Wyrm) counter ground melee but vulnerable to ranged anti-air (Archer, Rifleman).
- Creep blocking and pulling – Use a unit (e.g., Wisp) to stand on the creep camp’s spawn point to delay reactivation. This denies the enemy gold and XP from that camp. Works on most neutral camps.
- Perfect creep route – On most maps, start with the closest green camp (level 1-2) for a few XP, then move to the next camp. Your Hero should reach level 3 by 4-5 minutes if you creep efficiently without missing expansion timings.
- Item micromanagement – Use items with cooldowns (e.g., Healing Wards, Dust of Appearance) proactively. Place Health Scrolls on melee units to heal your army. Keep a Town Portal on all Heroes.
- Hero micro – Orb of Lightning / Frost – These orbs add a slow or lightning damage to attacks. Use them to kite an enemy Hero: hit, run, hit. The slow ensures the enemy stays in range. Requires practice but devastating.
- Split army control – Use control groups: 1 for Hero, 2 for melee, 3 for ranged/casters, 4 for siege. This allows you to micro melee to soak damage while casters cast spells (e.g., Polymorph, Nova).
- Mind games and feints – Send a small group (e.g., 2 Ghouls) to attack one base while your main army attacks another. The enemy may overcommit to defense. Or pretend to expand by building a fake Town Hall (cancel before completion) to draw enemy attention.
- Map-specific timings – On maps like Turtle Rock, the double-expansion gold mine is highly contested. Know the exact travel time to enemy base (e.g., 30 seconds for a footman). Plan attacks accordingly.
- Understand upkeep – Upkeep (low after 50 food, high after 80 food, max at 100) reduces gold income. If you’re over 50 food, you get 70% gold; over 80 food, 40% gold. Keep your army size just below 50 (or 80) if possible to maintain gold income for upgrades.
- Disband early game units – When teching to Tier 3, you may need to sell or disband low-tier units (e.g., Ghouls) to free up supply and reduce upkeep, then train higher-tier units.
- Collect bounty from killed units – Each enemy unit killed gives you gold (bounty). When you kill a large force, you effectively get a refund. Focus on killing high-bounty units (Heroes give 500 or more).
- Use Militia (call Peasants via Town Hall) to defend early rushes. This doesn’t cost food and gives strong melee for 45 seconds.
- Sorceress (Slow) + Rifleman (Focus Fire) is a classic combo for kiting orc melee.
- Blademaster with Wind Walk + Critical Strike can one-shot enemy Heroes if leveled high enough. Scout with Wind Walk.
- Use Spirit Walkers to dispel summoned units (e.g., Water Elemental) with Dispel Magic.
- Wisp can harvest lumber and also act as a Detector (unrooted) when turned into a Detector (via research). Use them to scout and detect invisibility.
- Poison Arrows from Dryads are great against high-HP units; they stack damage over time.
- Ghoul Frenzy upgrade (at Crypt) boosts Ghoul attack speed by 35%; essential for early creep and harvest.
- Obsidian Statues can be turned into Destroyers (anti-magic air unit) – upgrade at the Temple of the Damned.
- Replays and analysis – Watch your own replays (saved automatically). Identify moments when you forgot to train workers, missed a creep camp, or lost a Hero. Study pro replays (e.g., Grubby, Moon, Lyn) to learn build orders and micro.
- Custom games – Play vs. AI (Easy, Normal, Insane) to practice macro and micro. Then move to ladder or B.net. Use unit-test maps (e.g., "Micro Tournament") to sharpen control.
- Use keyboard shortcuts – Learn all hotkeys (e.g., B for Barracks, G for Grunt). Disable mouse-heavy actions for speed. Bind your own hotkeys if needed.
Combat Tips (Micro & Macro)
Exploration & Scouting Tips
Resources & Economy Tips
Build Orders & Tech Paths
Advanced Optimizations
Economy & Upkeep System
Race-Specific Tips
Human
Orc
Night Elf
Undead
Practice and Improvement
By applying these tips, you will improve your Warcraft III gameplay from a beginner struggling with worker production to an advanced player who can micro armies, manage economies, and outplay opponents. Practice consistently, and remember: scouting and adaptability are the keys to victory.
Game Settings
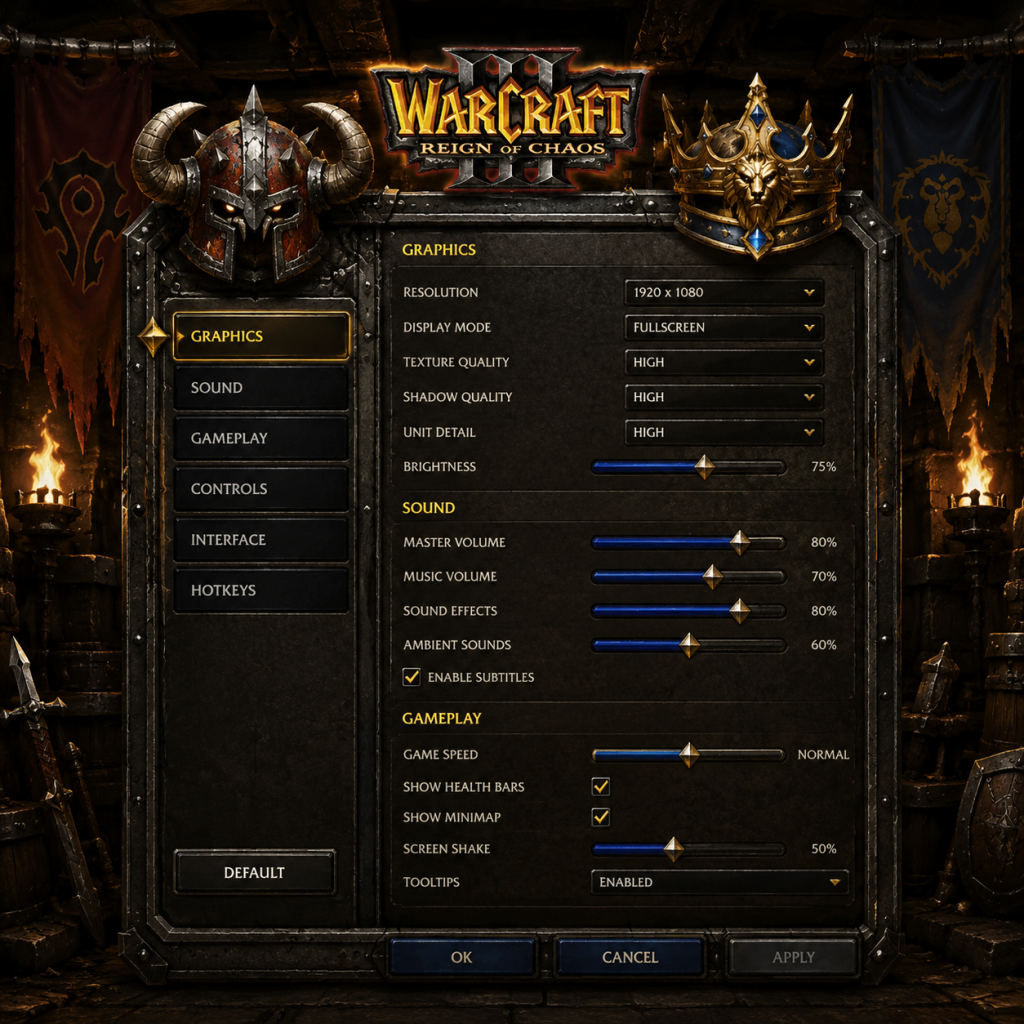
Game Settings Guide for Warcraft III (Reforged & Classic)
This guide covers all major settings categories in Warcraft III (both Reforged and Classic modes) and provides recommendations for optimizing performance, visual quality, and comfort. Settings are split into Graphics, Audio, Controls, Accessibility, Language, Network, and Gameplay.
General Setup Notes
- The game can be played in Reforged mode (remastered graphics) or Classic mode (original 2002 art). Mode is selected at the bottom of the Settings menu under "Gameplay" > "Game Data" > "Rendering Mode". Classic mode drastically reduces system requirements.
- Reforged mode has two sub-settings: Reforged (HD) and Reforged (Classic UI) – the latter keeps classic interface but uses new models.
- All settings can be changed from the main menu Options button. Some require a restart to take effect (noted).
1. Graphics Settings
Settings found under Options > Video. Affects performance heavily.
| Setting | Description | Recommendation |
|---|---|---|
| Resolution | Display resolution. Higher = sharper but more GPU load. | Native monitor resolution for best clarity. |
| Refresh Rate | Monitor Hz. Higher = smoother motion. | Set to monitor's native (e.g., 144Hz). |
| Display Mode | Fullscreen, Windowed, Windowed (Fullscreen). | Windowed (Fullscreen) for Alt+Tab stability. Fullscreen classic may cause issues on modern multi-monitor setups. |
| Gamma | Brightness. Calibrate so that the Blizzard logo is barely visible. | Adjust to personal preference; default 0.5 is fine. |
| Rendering Mode | Reforged HD (new models, lighting, shaders) or Classic (original sprites). | High-end: Reforged HD. Mid-end: Reforged HD with lowered details. Low-end: Classic mode. |
| Texture Quality | Resolution of unit/building textures. | Low (256) for performance, High (1024) for quality. |
| Shader Quality | Pixel and vertex shader effects. Low disables most. | Medium on mid GPUs, High on high, Low on low-end. |
| Lighting Quality | Dynamic shadows, ambient occlusion. | Medium or Low for performance. |
| Unit/Environmental Detail | Draw distance and model complexity. | Medium to High. |
| Particle Effects | Spell particles, projectiles, etc. | Medium; High can cause clutter. |
| Terrain Quality | Ground textures and geometry. | Medium; High increases load time. |
| Fog of War | Classic (transparent) or Reforged (volumetric). | Classic for performance. |
| Post-Processing Effects | Bloom, color grading. | Off for clarity. |
| V-Sync | Syncs frame rate to monitor refresh; reduces tearing but adds input lag. | On if screen tearing present, otherwise Off. |
| Max Foreground FPS | Limits FPS when game window is active. | Set to monitor refresh rate or unlimited if temps are fine. |
| Max Background FPS | Limits FPS when minimized. | 15-30 to save resources. |
Low-End (Integrated graphics, e.g., Intel UHD, AMD Vega 3)
- Rendering Mode: Classic
- Resolution: 1366x768 or native at 60Hz
- Texture Quality: Low (256)
- Shader Quality: Off/Low
- Lighting Quality: Off
- Unit Detail: Low
- Terrain: Low
- Particle: Low
- Fog of War: Classic
- V-Sync: On (or use monitor's adaptive sync)
- Perf Tip: Disable all post-processing.
- Rendering Mode: Reforged HD
- Resolution: 1920x1080
- Texture Quality: High (1024)
- Shader Quality: Medium
- Lighting Quality: Medium
- Unit Detail: High
- Terrain: Medium
- Particle: Medium
- Fog of War: Classic (or Reforged if willing to drop details)
- V-Sync: Off for lower input lag, cap FPS at 60.
- Rendering Mode: Reforged HD
- Resolution: 2560x1440 or 4K (3840x2160)
- Texture Quality: High (1024)
- Shader Quality: High
- Lighting Quality: High
- Unit Detail: High
- Terrain: High
- Particle: High
- Fog of War: Reforged (volumetric)
- Post-Processing: On (can toggle Bloom off for better readability)
- V-Sync: Off; use G-Sync/FreeSync if available.
- Max Foreground FPS: 144 or unlimited.
- Rendering Mode: Changing from Reforged to Classic requires a game restart to take full effect (some UI elements may not change immediately). Also, switching between Reforged HD and Reforged Classic UI can cause temporary texture bugs.
- Max Foreground FPS: Setting this too low (e.g., 30) makes the game feel sluggish. Ensure it matches your monitor's refresh rate or is at least 60.
- Gamma: Overbrightening (gamma > 0.7) washes out colors and makes minimap hard to read. The in-game calibration tool (see accessibility) is better.
Mid-Range (GTX 1050 / RX 560 / GTX 1650)
High-End (RTX 2060 / RX 5700 and above)
#### Easy to Misconfigure Settings
2. Audio Settings
Located under Options > Audio.
| Setting | Description | Recommendation |
|---|
| Sound Effects | Unit voices, combat, abilities. | 100%. Crucial for RTS cues.
| Music | Background music. | 50-70% (music can drown out sounds).
| Ambient | Environment sounds (wind, rivers). | 30-50%.
| Cinematic | Volume during cutscenes. | Match Master.
| Subtitle Display | On/Off. | On for accessibility and understanding story.
| Audio Output | Speakers / Headphones / 5.1 / 7.1. | Choose correct for your system. 5.1/7.1 can give spatial advantage but may cause volume issues if not properly set up.
| Sound Quality | Low/High. High uses better sample rate. | High; Low only needed for very old systems.
| Play Audio in Background | On/Off. | On if you want to hear alerts while alt-tabbed.
Special note: Setting audio to Low Quality can reduce CPU overhead slightly, but makes unit voices sound tinny. Only use on extremely low-end systems.
3. Controls Settings
Located under Options > Gameplay > Controls (Reforged) or Options > Controls (Classic). Key bindings can be customized.
#### Key Binding Customization
- Hotkeys: The game offers three presets:
- Grid Keys: If you use Standard, ability keys follow a grid (top-left = Q, top-right = W, etc.). This is good for memorization.
- Control Groups: By default, Ctrl+1 through Ctrl+0 bind units. You can change these.
- Attack Move: Default is A + left-click. Many players rebind to a mouse button for convenience.
- Mouse Sensitivity: Invert is available; adjust to your comfort.
- Scroll Speed: How fast the camera moves when you move the mouse to the edge of the screen. Recommended: 50-75% default.
- Camera Follows Hero: On/Off – If on, the camera tracks your hero automatically. Many players turn this Off for better control.
- Right-Click Selects: On/Off – If on, right-click selects units (alternative to left-click). Rarely used.
- Click-to-Move Reaction: No setting, but low FPS can cause delay. Ensure stable FPS.
- Control Group bindings: Accidentally setting them to non-standard keys (like F1-F5) can break muscle memory. Always test in a custom game.
- Attack Move vs Attack: The default key for Attack Move is A. If you rebind it, you may lose the ability to attack-move quickly.
- Camera Follows Hero: If set to On, the camera will jerk when your hero moves. New players sometimes assume it's broken. Turn Off for smoother play.
- Standard (default, uses QWER for abilities)
- Classic (legacy hotkeys, e.g., T for Train, etc.)
- Custom – You can rebind every action.
#### Mouse Settings
#### Easy to Misconfigure Settings
4. Accessibility Settings
Mostly found under Options > Accessibility (Reforged) and some in Gameplay.
| Setting | Description | Recommendation |
|---|---|---|
| Colorblind Filters | Protanopia, Deuteranopia, Tritanopia, Grayscale. | Enable appropriate for your color vision deficiency. |
| Text Size | Small/Medium/Large. | Large if playing on 4K monitor or far from screen.
| Voice Speed | Normal/Slow (for unit voices). | Normal; Slow is for learning.
| Subtitle Background | Darkens subtitle area for readability. | On.
| Screen Shake | On/Off. | Off for motion sickness or fatigue.
| Camera Shake | Similar to screen shake but only in combat. | Off if sensitive.
| Minimap Click Precision | No setting, but larger minimap option in Gameplay helps.
| Auto-Select New Units | On/Off. | On helps beginners track new buildings/units; Off for pros.
| Automated Workers | On/Off (in Gameplay). | On reduces need to manually send workers to mine. Good for casual.
| Smart Harvest | On/Off. | If on, workers automatically find resource fields. Kept On.
Special attention: The Colorblind Filters are not available in Classic mode. Use Reforged mode for these. Also, Voice Speed does not affect subtitles – subtitles always display full text.
5. Language Settings
Found in Battle.net launcher and in-game under Options > Language.
- In-Game Voice Language: Choose language for unit voices (e.g., English, Korean, Chinese, etc.). Does not affect text.
- Text Language: UI text and subtitles. Can be different from voice.
- Speech Recognition: Not used in Warcraft III.
Note: Language packs are downloaded separately. Changing voice language requires a restart and may trigger a download of several hundred MB. Plan ahead.
6. Network Settings
Under Options > Network (Reforged) or Options > Gameplay > Network (Classic).
| Setting | Description | Recommendation |
|---|
| Port | Port numbers for custom games (UDP 6112 default). | Only change if behind a strict firewall or multiple instances.
| Network Speed | Choice between Low Bandwidth (56k/ISDN) or High (Cable/DSL). | Always High (unless on dial-up).
| Optimize Network for Speed | On/Off. On reduces quality for faster data. | Off for stable games; On if laggy.
| Allow Players to Join During Game | On/Off. | On for custom games, Off for ranked.
| Download Custom Games | On/Off. | On to auto-download maps from host.
| Maximum Upload Rate | Limit bandwidth used for hosting. | 0 (unlimited) if you have decent upload; else set to 512 Kbps.
Common Pitfall: If you are behind a router, you may need to open UDP port 6112 for hosting games. The game's built-in port test is unreliable; manually forward it in router settings.
Note on Reforged vs Classic Network: Classic mode uses older networking (often requires peer-to-peer ports). Reforged uses Blizzard's servers for matchmaking but custom games still rely on P2P. Port forwarding helps both.
7. Gameplay Settings
Located under Options > Gameplay (Reforged) or Options > Gameplay (Classic).
#### UI & Game Data
| Setting | Description | Recommendation |
|---|---|---|
| Game Data | Choose which expansion data to use: Reign of Chaos, The Frozen Throne, or Classic. | The Frozen Throne (includes everything). |
| Enable Classic WarCraft III Soundtrack | On/Off. Restores original music. | On for nostalgia; Off for Reforged music.
| Enable Classic Voiceovers | On/Off. Uses original voice lines. | On for nostalgia; Off for new recordings.
| Team Color on Health Bars | On/Off. Red/Blue/Green/etc. | On for clarity.
| Show Health Bars | Always, Damage Only, Never. | Always for RTS.
| Minimap | Size: Small/Medium/Large. | Large for visibility.
| Minimap Signal Mode | Standard/Magnified. | Magnified helps see pings clearly.
| Replay Save Location | Set folder. | Default is fine.
#### Advanced Gameplay
| Setting | Description | Recommendation |
|---|
| Auto-Repair | On/Off for Peasants/Wisps. | Off to avoid accidental resource drain.
| Smart Harvest | On/Off. Workers find nearest resource. | On.
| Minimap Click Moves Camera | On/Off. | On.
| Double Mouse Button | Functions for double-click to select all units of same type. | On.
| Drag and Select | On/Off. | On.
| Enemy Color | Fixed (red, blue, etc.) or Team Color. | Fixed for easy identification.
| Automatic Exit to Desktop after Match | On/Off. | Off (you may want to view stats).
#### Easy to Misconfigure Gameplay Settings
- Automatically Send Workers: If you turn this Off, you must manually command workers to mine after building them. New players often wonder why workers idle.
- Smart Harvest: Off requires manual ordering of workers to specific gold mines or trees – useful for advanced resource management but confusing for casual.
- Show Health Bars: Setting it to "Damage Only" hides full-health bars, making it hard to assess army strength at a glance.
- Team Color on Health Bars: If Off, health bars are all green, making it hard to distinguish allies from enemies.
Summary of Critical Settings
1. Rendering Mode – Choose Classic for low-end, Reforged HD for high-end. Requires restart.
2. Resolution & Refresh Rate – Set to native.
3. FPS limits – Foreground at monitor Hz, Background at 15-30.
4. Audio Language – Change only before major play; large download.
5. Network Port – Forward UDP 6112 if hosting.
6. Automated Workers – On unless you're experienced.
7. Health Bars – Always.
8. Camera Follows Hero – Off for better control.
Test all settings in a custom game vs AI before jumping into multiplayer. Settings that cause crashes (rare) can be reset by deleting the config files in `%userprofile%\Documents\Warcraft III\CustomMapData\Settings\`.
---
This guide applies to both Reforged (v1.32+) and Classic modes. For specific differences, see the individual setting notes.
Important Notes
Important Notes for Warcraft III (Reforged & Classic)\n\nThis section covers crucial warnings, pitfalls, and tips that every player—whether new or returning—should know. Avoiding these common mistakes will save you frustration, time, and irreversible losses.\n\n### 1. Irreversible Choices & Missable Content\n\n#### Campaign Branching & Hidden Objectives\n- Human Campaign (Reign of Chaos): In \"The Culling,\" you are given a choice to either burn the undead-infested buildings or save civilians. This affects your final score and some dialogue but has no long-term impact on the story. However, missing optional side-objectives (e.g., the Dwarven King's quest in \"The Siege of the Sunwell\") can lock you out of bonus items or lore.\n- Orc Campaign: The mission \"The Oracle\" is entirely missable. To access it, you must complete a specific hidden chain during \"The Sundering.\" If you kill the Murloc camp too quickly, you lose the chance. Always explore every corner and interact with neutral units.\n- Night Elf Campaign (Reign of Chaos): In \"The Defense of the Temple of the Moon,\" the optional quest to save the wild animals yields a temporary buff. Failing it doesn't break the game, but micromanaging your forces to complete it is recommended for the extra edge.\n- Undead Campaign (The Frozen Throne): In \"The Invasion of Quel'Thalas,\” you can choose to kill or spare certain high Elven heroes. Sparing them may lead to a slightly easier final fight, but the choice is permanent for that playthrough.\n\n#### Hero Skill Allocation\n- Irreversible once confirmed after each level-up (unless you use a cheat code or restart the mission). Common regret: putting points into passives too early instead of core nuke or summoning spells. For example, a Blademaster without early Wind Walk is significantly weaker in the Orc campaign. Save your skill point if unsure—the game lets you hold it until you commit.\n- Respec is not possible without cheats or mods. Plan your hero build according to the mission objectives. For instance, in \"The Culling,\" a focused Fire Orb build on the Paladin is more effective than spreading points.\n\n### 2. Difficulty Spikes & Tactical Pitfalls\n\n| Mission | Campaign | Pain Point | Advice |\n|---------|----------|------------|--------|\n| \"The Culling\" | Human RoC | Defend the city gates for 25 minutes while waves increase. | Focus on upgrading towers early, use Arthas' Holy Light to heal key units, and do not chase units outside. |\n| \"The Defense of the Temple of the Moon\" | Night Elf RoC | Hold off endless Undead waves with limited resources. | Barricade entrances with moon wells and Huntresses. Use Priestess' Starfall wisely. |\n| \"The Fall of the Lich King\" | Undead RoC | Final boss fight against the Lich King with severe time pressure. | Micro your Death Knight and Dreadlord heavily. Use all ultimates and mana items. |\n| \"The Search for Illidan\" (Bonus) | Night Elf TFT | Extremely tight timer to gather resources and kill Illidan. | Ignore side quests, rush tier-3 and Chimaeras. |\n\n- Multiplayer ladder has a steep learning curve. Even in lower leagues, opponents will use efficient build orders and micro. Expect to get crushed for the first 20-30 games unless you practice a basic strategy (e.g., Human Rifleman + Priest push).\n\n### 3. Grinding Traps & Time Wasters\n\n- Campaign resource hoarding: In many missions, you restart with fresh resources in the next chapter. There is no benefit to stockpiling 10,000 gold—spend it on units and upgrades to win faster. Only a few interconnected maps (e.g., in The Frozen Throne's Night Elf campaign) carry over. Always check the mission briefing.\n- Creep camps are optional except those guarding objectives. Killing every neutral for experience can waste time. Prioritize critical creeps (those blocking your path or guarding items). Over-farming may leave you underprepared for timed objectives.\n- Custom games that promise “free loot” or “fast leveling” are often scams or require hours of repetition (e.g., tower defense maps with 100 waves). Use the map's description or forums to check if it's worth your time.\n\n### 4. Online Etiquette & Anti-Cheat Notes\n\n#### Playing on Battle.net\n- Cheating is banned and can result in permanent account suspension. This includes maphack, lag switches, and third-party tools. Reforged has enhanced anti-cheat that flags unusual gameplay patterns (e.g., unrealistically fast resource gathering).\n- Respect the lobby: Do not pause without reason, do not feed intentionally, and follow the host’s rules (no rush, no hero etc.). If you must quit, type “gg” and leave via the menu. Rage quitting ruins the experience for others.\n- Chat behavior: Avoid spamming, racist/hate speech, or excessive caps. Blizzard enforces the Code of Conduct; repeated violations lead to silence or bans.\n- Custom game hosts: If a host sets a password, do not beg. If you disconnect, wait a moment before re-joining. Many maps have reconnect features.\n\n### 5. Save Management Advice\n\n- Use multiple save slots per campaign. Keep at least three different saves: one at the start of the mission, one mid-mission, and one after major objective completion. This prevents having to restart from scratch if you make a fatal error.\n- Before a boss fight or dialogue choice, save manually. Auto-saves overwrite quickly. For example, before the final choice in \"The Culling,\” create a named save so you can reload to try the other outcome.\n- Back up your save folder (located in `Documents/Warcraft III/Campaigns` or `Battle.net Cache` for Reforged) before reinstalling or switching computers. Campaign progress is stored locally.\n- Do not rely on cloud saves entirely—Blizzard’s sync is not instant and can sometimes corrupt if Battle.net crashes during upload.\n\n### 6. Things Players Commonly Regret Not Knowing Earlier\n\n- Hotkeys are essential. Default hotkeys are clunky; rebind them to something comfortable (e.g., QWER for spells). Practice attack-move (`A/Shift`) and stop (`S`) to avoid losing units to autocast.\n- You can reorganize your control groups by holding `Ctrl` and pressing a number, then clicking the portrait of a unit to remove it from the group. This is vital for delicate micro.\n- The Alt key shows unit health bars—always keep it pressed during fights.\n- Creeps respawn on many custom maps, but not in campaign missions—except special cases like The Frozen Throne's 'The Awakening of the Storm' where neutral camps repopulate after a long timer.\n- Heroes can carry up to 6 items but only items from their faction? Actually, you can pick up any item, but some are race-locked (e.g., Orc heroes cannot use the Staff of Sanctuary from Humans). Check the tooltip.\n- The fastest way to level a hero is to kill creeps equal to or slightly higher than your level (Green to Yellow level). Red creeps give more XP but risk death; Gray creeps give almost none.\n- If you are stuck on a mission, search for “Warcraft III [mission name] walkthrough” on YouTube—the community has made step-by-step guides for every level.\n\n### 7. Final Notes\n\n- Reforged vs Classic: Classic mode runs smoother on low-end PCs and has the original UI. Reforged may have performance dips in multiplayer. You can toggle between graphics in the settings menu.\n- Modding community: Custom maps require downloading files. Only download from trusted sources (e.g., Hive Workshop, Epic War) to avoid malware. Be wary of .exe files claiming to be mod installers.\n- Game is still actively supported (patches as of 2024), but customer support for old bugs in Classic may be limited.\n\nBy keeping these notes in mind, you will avoid the pitfalls that frustrate many players. Happy commanding!
All Game Items
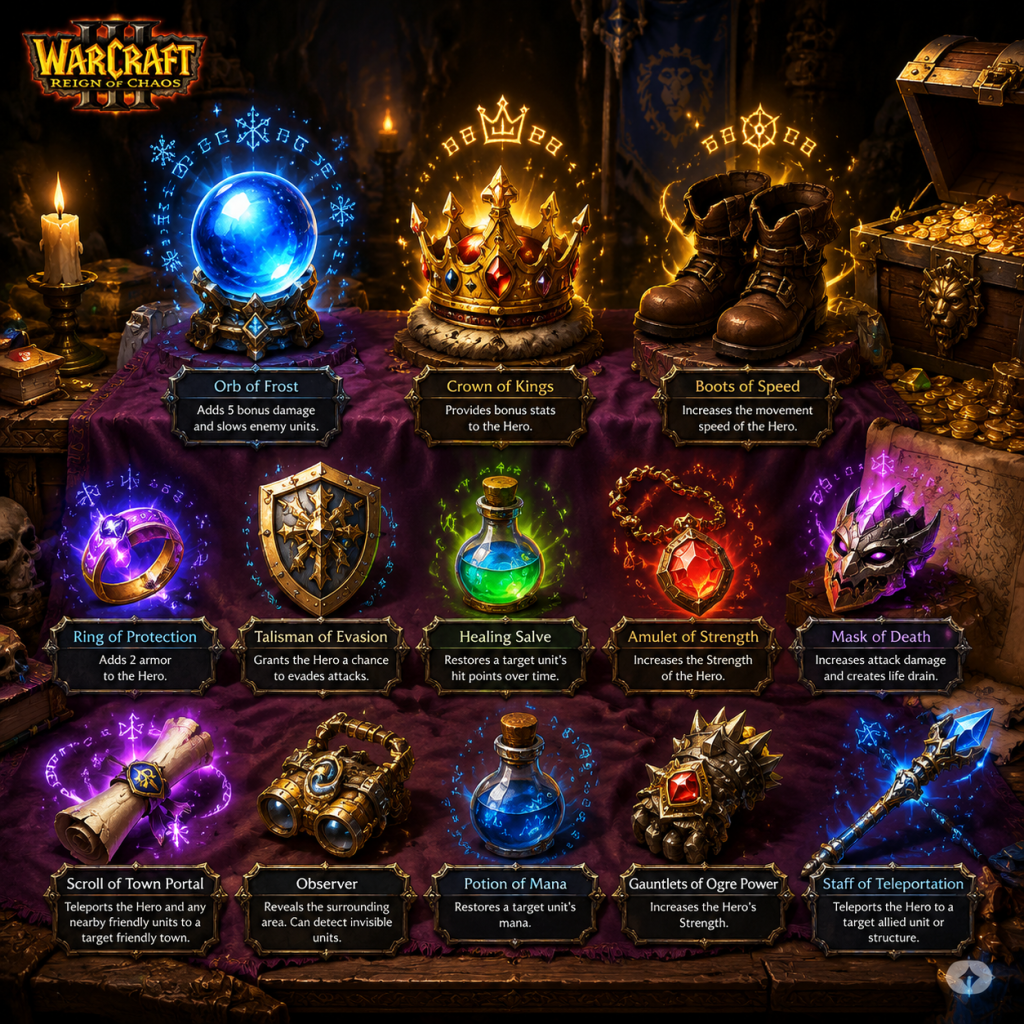
All Game Items Guide for Warcraft III (Reforged & Classic)
This comprehensive guide covers every significant item in Warcraft III, including the Reign of Chaos and The Frozen Throne expansions. Items are grouped by category: weapons, armor, consumables, artifacts, materials, currencies, collectibles, and key equipment. Each entry explains what the item does, how to obtain it, when it is most useful, and any important synergies or upgrades.
1. Weapons
Weapons grant attack bonuses, special abilities, or passive effects when held by heroes or units.
| Item | Effect | How to Obtain | When Useful | Synergies/Upgrades |
|---|---|---|---|---|
| Claws of Attack +5 / +10 / +15 | Adds bonus damage to hero’s attacks. | Creep drops (neutral camps), shops (Tier 2+ merchants), quest rewards in campaigns. | Always useful for any melee or ranged hero; stacking multiple copies boosts DPS significantly. | No direct upgrades, but can be combined with attack-speed items. |
| Sobi Mask | +50% mana regeneration. | Creep drops, shop (Tier 1). | Essential for mana-dependent heroes (e.g., Lich, Keeper of the Grove) early game. | Upgrades into Mask of Death via recipe (in some custom maps) but not in standard gameplay. |
| Mask of Death | +15% lifesteal. | Drop from high-level creeps (neutral level 10+), or shop (Tier 3) in some maps. | Great for melee heroes to sustain in fights. | Combines with damage items for increased healing. |
| Orb of Fire | Ranged attacks deal splash damage (small AOE). | Creep drop (level 6+), shop (Tier 2) in melee games. | Good against clumped units; excellent on heroes with multishot (e.g., PotM). | Stacks with other orbs? No, orbs are mutually exclusive. |
| Orb of Lightning | Slows enemy movement and attack speed for 3 seconds. | Creep drop (level 7+), shop (Tier 3). | Useful for kiting or chasing; strong on ranged heroes. | Overrides other orb effects. |
| Orb of Corruption | Reduces enemy armor by 8 for 5 seconds. | Creep drop (level 8+), shop (Tier 3). | Excellent against high-armor units; stacks with all attack types. | Synergizes with armor-reducing spells (e.g., Faerie Fire). |
| Execute (Blade Mail equivalent) | Reflects 100% damage taken back to attacker for 4 seconds. | Creep drop (neutral level 9+), shop (Tier 3). | Use on initiation hero (e.g., Tauren Chieftain) to discourage focus. | No upgrade, but pairs with tanky heroes. |
| Slippers of Agility / Gauntlets of Strength / Mantle of Intelligence | +2/4/6 to primary attribute. | Creep drops, shop (Tier 1). | Cheap stat boost for early game; good for filling inventory slots. | Can be upgraded via recipes in custom games but not in standard. |
2. Armor & Protection
Items that increase survivability through armor, health, or resistances.
| Item | Effect | How to Obtain | When Useful | Synergies/Upgrades |
|---|---|---|---|---|
| Ring of Protection +2 / +4 / +6 | Adds armor (damage reduction). | Creep drops, shop (Tier 1-2). | Helps tanky heroes or units survive longer against physical damage. | Stacks with other armor items. |
| Cloak of Flames | Aura: 5 DPS fire damage to nearby enemies. | Creep drop (level 6+), shop (Tier 2). | Good on melee heroes who stay in the fray; area denial. | Does not stack with multiple cloaks, but works with other auras. |
| Plated Armor | +8 armor (flat bonus). | Quest reward (campaign), rare creep drop. | Excellent for front-line heroes (e.g., Mountain King). | No upgrade. |
| Resistance Ring | +30% magic resistance. | Creep drop (level 7+), shop (Tier 2). | Essential against spell-casting enemies; stack multiple to become nearly immune. | Synergizes with spell immunity items. |
| Invisibility Potion | Makes hero invisible for 15 seconds. | Creep drop, shop (Tier 1). | Use for escapes, scouting, or ambushes. | No upgrade, but can be combined with movement speed items. |
| Holy Shield | Gives invulnerability for 5 seconds (can cast on self or ally). | Creep drop (level 8+), shop (Tier 2) in some modes. | Life-saving active; essential for heroes in dangerous situations. | No upgrade. |
3. Consumables & Potions
One-use items that restore health, mana, or provide temporary buffs.
| Item | Effect | How to Obtain | When Useful | Notes |
|---|---|---|---|---|
| Healing Potion | Restores 250 HP over 10 seconds (can be interrupted). | Creep drops, shop (Tier 1). | Standard healing item; use during downtime or before battles. | Better combined with Mana Potion. |
| Mana Potion | Restores 150 MP over 10 seconds. | Creep drops, shop (Tier 1). | Essential for mana-intensive heroes; often bought in bulk. | Avoid use while under attack. |
| Greater Healing Potion | Restores 500 HP over 10 seconds. | Creep drops (level 7+), shop (Tier 2). | Stronger healing for tankier heroes. | Same rules as lesser version. |
| Greater Mana Potion | Restores 300 MP over 10 seconds. | Creep drops (level 7+), shop (Tier 2). | For heroes like Archmage or Lich. | - |
| Full Restoration Potion | Fully restores HP and MP instantly. | Rare creep drop (level 9+), quest reward. | Emergency survival or to continue attacking. | Very valuable; keep for critical moments. |
| Potion of Greater Invisibility | Makes hero invisible for 45 seconds (breaks on attack). | Rare drop, shop (Tier 3) in some modes. | Long-duration invisibility for sneaky tactics. | Can be used on allies. |
| Scroll of Town Portal | Teleports the hero to your main hall (or nearest ally town). | Shop (Tier 1), creep drops. | Essential for quick escapes or repositioning. | Stock up early; cooldown per hero. |
| Scroll of Protection | +5 armor to all friendly units in a small area for 30 seconds. | Creep drop, shop (Tier 2). | Good before engaging a strong enemy push. | - |
| Scroll of Healing | Heals 400 HP to all friendly units in an area (creeps and allies). | Creep drop, shop (Tier 2). | Mass healing for your army; great in team fights. | - |
| Scroll of Mana | Restores 200 MP to all friendly heroes in area. | Creep drop, shop (Tier 2). | Mana restoration for multiple heroes. | - |
| Ankh of Reincarnation | Automatically revives the hero once upon death (full HP/MP). | Creep drop (level 10+), quest reward. | Extremely valuable; gives a second chance in crucial fights. | Does not stack; only one active per hero. |
4. Artifacts & Power-Ups
Unique, powerful items often with game-changing effects.
| Item | Effect | How to Obtain | When Useful | Notes |
|---|---|---|---|---|
| Book of Experience | Gives 1000 XP to the hero. | Creep drop (level 8+), quest reward. | Fast leveling; use when close to leveling up or after a death. | Cannot be used on max-level heroes (level 10). |
| Tome of Experience | Gives 200 XP. | Creep drop, shop (Tier 3) in some modes. | Smaller XP boost; good for early levels. | - |
| Tome of Retraining | Resets all skill points (hero can reallocate). | Creep drop (level 9+), shop (Tier 3). | Essential for correcting skill builds or adapting to enemy. | Use on heroes with poorly chosen talents. |
| Gem of True Sight | Reveals invisible units in a 900 radius aura. | Creep drop (level 6+), shop (Tier 2). | Critical against invisibility-based enemies (e.g., Wind Walk, Rune of Invisibility). | Dropped on death; never destroyed unless eaten by a monster. |
| Orb of Annihilation | Deals 250 damage to a single enemy on attack (cooldown 2s). | Creep drop (level 10+, boss). | Extremely powerful for ranged heroes; can burst down targets. | Overrides other orb effects. |
| Ring of Regeneration | +1 HP/sec regeneration. | Creep drop, shop (Tier 1). | Steady health regen for sustained fights. | Stack multiple for better regen. |
| Moonstone | Sets time to night (if used during day). | Campaign reward (Night Elf), rare drop. | Useful for Night Elf heroes to boost their abilities (e.g., Shadowmeld). | - |
| Horn of the Clouds | Creates a rain cloud that heals ally units (50 HP per 5 sec) over an area. | Quest reward (Alliance campaign). | Limited uses; good in sieges. | - |
5. Materials & Currencies
Resources used for crafting, upgrading units, or buying items in special maps. In standard melee, these are not typical; but in campaign/scenarios:
| Item | Effect | How to Obtain | Use |
|---|---|---|---|
| Gold | Primary currency. | Mining gold mines, selling items, quests, bounties. | Buy units, buildings, items, upgrades. |
| Lumber | Secondary currency. | Chopping trees. | Construct buildings, upgrade structures. |
| Mithril (campaign) | Rare metal for special upgrades. | Quest rewards, hidden areas. | Upgrade weapons/armor (e.g., in Orc campaign). |
| Ancient Relic | Quest item in some custom maps. | Drop from boss creeps. | Used to activate certain events. |
| Runes (in some maps) | Consumable that grants temporary power (e.g., Rune of Healing, Rune of Mana). | Creep drops, power-ups on map. | Instant effect; common in hero arenas. |
6. Collectibles & Quest Items
Items that are not equippable but serve story objectives or unlock content.
| Item | Effect | How to Obtain | Relevance |
|---|---|---|---|
| Medal of Courage | Proves hero’s valor (campaign). | Quest reward (Human campaign). | Advances plot; also gives +1 to all stats in some versions. |
| Pendant of the Lady Vashj | Key item in Night Elf campaign. | Drop from Lady Vashj (boss). | Opens a door or triggers a cutscene. |
| Shard of the Frozen Throne | Collected pieces (3 total) in Frozen Throne campaign. | Quest progression. | Used to defeat the final boss. |
| Book of the Dead | Summons 8 skeletons (campaign). | Quest reward (Undead campaign). | Useful for overwhelming enemies; one-time use. |
| Tome of Knowledge | Grants +2 to all attributes permanently. | Rare creeps, hidden areas. | Permanent stat boost; very valuable. |
| Potion of Greater Mana + Mana Battery | (not separate, but combo) | - | - |
7. Key Equipment (Special Items)
| Item | Effect | How to Obtain | When Useful |
|---|---|---|---|
| Staff of Negation | Dispel an enemy’s buffs or damage over time. | Creep drop, shop (Tier 2). | Against spell-reliant heroes (e.g., Blood Mage’s Banish). |
| Wand of Lightning | Deals 75 damage and slows target (4 sec). | Creep drop, shop (Tier 2). | Good for chasing or finishing low-HP enemies. |
| Wand of Illusion | Creates a 100% damage illusion of target unit for 60 seconds. | Creep drop, shop (Tier 3). | Use on your own hero for fake presence, or on enemy to trick. |
| Boots of Speed | +60 movement speed. | Creep drop (level 6+), shop (Tier 2). | Essential for kiting, chasing, or fleeing. |
| Boots of Travel | +90 movement speed and can teleport to any ally building (cooldown 60s). | Creep drop (level 9+), shop (Tier 3). | Superior mobility; great for map control. |
| Helm of Battle | +6 damage, +2 armor, +2 HP regen. | Creep drop (level 8+). | All-around solid stats for any hero. |
| Crown of Kings | +6 to all attributes. | Creep drop (level 10, boss). | One of the best stat items. |
| Aegis of the Fallen | Makes hero immune to negative magic for 12 seconds (active). | Creep drop (level 10+). | Excellent to counter mass dispel or stuns. |
Important Notes on Item Management
- Inventory Slots: Heroes have 6 slots. Prioritize items that complement your hero’s role (e.g., damage for carries, tank items for initiators).
- Selling Items: Right-click an item in a shop to sell it for half its gold value. Use this to recycle unwanted items.
- Dropping Items: Items can be dropped on the ground; they last 60 seconds before despawning. Be careful not to lose valuable items.
- Upgrading: Some items can be upgraded via recipes in custom games, but standard Warcraft III melee has no item upgrades (except via shop tiers). Always check the game mode.
- Campaign vs Melee: Quest items are only found in campaigns; melee games focus on creep drops and shop items. This guide covers both, but note that item availability varies by map.
This guide provides a foundation for all items in Warcraft III. Use it to optimize your hero builds and dominate the battlefield.
Character Skills
"content": "## Hero Skills Guide for Warcraft III (Reign of Chaos & The Frozen Throne)\n\nThis comprehensive guide covers every hero ability in Warcraft III, including the four primary races (Human, Orc, Night Elf, Undead) and the neutral heroes available from Taverns in The Frozen Throne. Each hero has three standard abilities (learned at levels 1, 3, and 5, upgradable to level 3) and one ultimate ability (learned at level 6, upgradable to level 3).\n\n## Human Alliance\n\n### Archmage\n- Blizzard (Active, Area of Effect): Calls down ice shards to deal damage in a target area over time. Damage per wave: 7/14/21 (total 28/56/84). Cooldown: 5 sec. Mana: 75/100/125. Duration: 4 waves over 4 sec. Combos: Use with Slow from Sorceresses or Ensnare from Orc units to keep enemies in AoE. Synergies: Excellent for softening large groups, especially with Brilliance Aura to maintain mana. Build: Max Blizzard first for heavy sieging or base defense. When to use: Vs clustered units or buildings; avoid hitting your own troops.\n- Water Elemental (Active, Summon): Summons a powerful water elemental. Stats scale with level: HP 300/400/500, damage 20/30/40, armor 0/1/2. Duration: 60 sec. Cooldown: 30 sec. Mana: 125. Combos: Use as tank or extra DPS. Synergies: With Brilliance Aura, you can constantly summon. Build: Often a strong first skill to creep and push. When to use: Early creeping, harassing, or as a meat shield.\n- Brilliance Aura (Passive, Aura): Increases mana regeneration of friendly units in 900 AoE. Bonus: 0.75/1.0/1.25 mana per second. Synergies: Essential for any caster-heavy army (Priests, Sorceresses, Spell Breakers). Build: Usually one level early to support mana, max later. When to use: Always active, useful throughout game.\n- Mass Teleport (Active, Ultimate): Teleports the Archmage and all friendly units in a target area (900 radius) to any allied building or unit. Cooldown: 15 sec at all levels. Mana: 100/75/50 at levels 1/2/3. Combos: Use to relocate army instantly, escape ganks, or drop on expansions. Synergies: Works with any teleport-receiving structure or unit like a Footman. Build: Learn at level 6. When to use: Strategic retreats, surprise attacks, or reinforcing battles instantly.\n\n### Mountain King\n- Storm Bolt (Active, Single Target): Throws a magical hammer stunning and damaging a target. Damage: 75/125/200. Stun duration: 2/2.5/3 sec. Cooldown: 7 sec. Mana: 75/85/95. Combos: Focus-fire high-value targets (Heroes, Abominations). Synergies: Interrupt casters or channeling units. Build: Max first for burst damage and control. When to use: Initiate on enemy hero, cancel channeled spells (e.g., Blizzard, Starfall).\n- Thunder Clap (Active, Area of Effect): Slams the ground dealing damage and reducing movement and attack speed of enemies in a 250 AoE. Damage: 25/55/85. Movement/attack speed slow: 50% for 4 sec. Cooldown: 7 sec. Mana: 80. Combos: Use after Storm Bolt to lock down multiple units. Synergies: Great with melee army to finish slowed enemies. Build: Often second priority, good vs. large groups. When to use: Initiate on clumped enemies, especially melee heavy armies.\n- Bash (Passive): Gives a chance to stun and deal additional damage on attack. Chance: 15% / 20% / 25%. Bonus damage: 25/30/35. Stun duration: 1 sec. Synergies: Pairs with attack speed items (Gloves of Haste, Boots of Speed). Build: Often maxed once you have attack speed. When to use: Passive, activates randomly; excellent for locking down enemy heroes.\n- Avatar (Active, Ultimate): Transforms the Mountain King into a giant stone form, increasing size, HP (regenerates fully), damage (by 40/60/80), and granting spell immunity. Duration: 40 sec. Cooldown: 120 sec. Mana: 40. Combos: Use during team fight to tank and dish damage. Synergies: Spells can’t affect him; use with Bash for maximum lockdown. Build: Learn at level 6. When to use: Engage enemy army or hero, especially against heavy casters.\n\n### Paladin\n- Holy Light (Active, Single Target, Heal or Damage): Heals a friendly unit or damages an undead unit. Heal damage: 130/210/290 (damage to Undead: 150/250/350). Cooldown: 5 sec (most versions 5 sec). Mana: 75/95/115. Combos: Use on main tank or to snipe Undead heroes (e.g., Death Knight). Synergies: Pair with Priest Heal for efficient healing. Build: Usually max first to support survivability. When to use: Emergency heal, or burst damage vs Undead.\n- Devotion Aura (Passive, Aura): Increases armor of all friendly units in 900 AoE. Bonus armor: +1.5/2.5/3.5 (scaling). Synergies: Great with Footmen and Knights for tanking. Build: One level early to help creeps, max later. When to use: Always active; value increases with more units.\n- Divine Shield (Active, Self): Renders the Paladin immune to all physical and magical damage for a time. Duration: 10/15/20 sec. Cooldown: 30 sec. Mana: 75/75/75. Combos: Use to escape, scout, or tank base towers. Synergies: Can be cast while using Holy Light. Build: Often situational; 1 level may suffice. When to use: Save life, absorb enemy attacks, or delay.\n- Resurrection (Active, Ultimate): Instantly revives a number of dead friendly units within a large area (600 AoE). Number revived: 3/5/8 (including heroes? No, only non-hero units). Cooldown: 120 sec. Mana: 80/80/80. Combos: Use after a big battle to replenish army. Synergies: Works with any dead unit; best in late-game armies. Build: Learn at level 6. When to use: After winning a large engagement, or to surprise enemy who thinks your army is gone.\n\n### Blood Mage (The Frozen Throne)\n- Flame Strike (Active, Area of Effect): Creates a blazing pillar dealing damage initially and then a damage-over-time effect on ground units. Initial damage: 85/125/165 (per target). DOT: 5/8/11 per second for 5 sec. Cooldown: 8 sec. Mana: 95/110/125. Combos: Use on clumped units, then follow with Blizzard or other AoE. Synergies: Slowing spells (Slow, Frost Armor) help keep enemies in flame. Build: Max first for heavy AoE. When to use: Packed enemy formations, base clearing.\n- Banish (Active, Single Target): Turns a target unit into an ethereal state, making it invulnerable to physical attacks but more vulnerable to magic (takes 66% increased spell damage). Duration: 8 sec. Cooldown: 10 sec. Mana: 65/70/75. Combos: Use before Flame Strike or other spells to amplify damage. Synergies: Great with heroes like Archmage (Blizzard) or casters. Build: Often 1 or 2 levels early for utility. When to use: Lock down high-value target or boost magic damage.\n- Siphon Mana (Active, Channeled): Drains mana from an enemy unit (or gives mana to friendly). Drains 8/16/24 mana per second. Duration: 3 sec max (can be stopped early). Cooldown: 5 sec. Mana: 0 (costs nothing, but needs target). Combos: Drain enemy casters to prevent their spells. Synergies: Refill own mana indefinitely. Build: Usually low priority, but powerful in prolonged fights. When to use: Mana-hungry engagements, neutralize enemy hero.\n- Phoenix (Active, Ultimate): Summons a powerful Phoenix that deals area damage and can revive after death as an egg. Phoenix duration: 60 sec. Egg revives after 10 sec if not destroyed. Cooldown: 180 sec. Mana: 175/150/125 (levels 1/2/3). Combos: Use Phoenix to tank and deal AoE damage. Synergies: Use with Flame Strike to maximize fire damage. Build: Learn at level 6. When to use: Siege, team fights, or split push.\n\n## Orc Horde\n\n### Blade Master\n- Wind Walk (Active, Self): Makes the Blade Master invisible and grants a critical damage bonus on the next attack. Invisibility duration: 15 sec. Critical damage: +40/70/100 (i.e., 1.4x/1.7x/2.0x damage). Cooldown: 5 sec. Mana: 75/85/95. Combos: Use to sneak into enemy base, kill workers, or escape. Synergies: Critical strike passive doubles burst. Build: Usually max first for harassment. When to use: Gank heroes, scout, backstab.\n- Mirror Image (Active, Self): Creates 2 illusions of the Blade Master that deal 10% damage each (separate stats at higher levels). Illusions last 20 sec. Cooldown: 8 sec. Mana: 100/110/120. Combos: Confuse enemy, absorb spells, or deal extra damage. Synergies: Use with Wind Walk to surprise. Build: Often level 1 or 2 for utility. When to use: Initiate or distract.\n- Critical Strike (Passive): Chance to deal double damage on attack. Chance: 10% / 15% / 20% (damage multiplier 2x at all levels). Combos: With Wind Walk's guaranteed crit, burst is high. Synergies: Attack speed items. Build: Max after Wind Walk. When to use: Passive, better with items.\n- Bladestorm (Active, Ultimate): Spins rapidly, dealing damage to all nearby enemies each second (50/60/70 damage per tick, 6 ticks per sec). Duration: 7 sec. Cooldown: 120 sec. Mana: 120/120/120. Combos: Use after Wind Walk to appear in enemy group. Synergies: Crowd control to keep enemies nearby. Build: Learn at level 6. When to use: Destroy large armies, buildings, or heroes; vulnerable to stuns.\n\n### Far Seer\n- Chain Lightning (Active, Target): Fires a bolt of lightning that bounces to nearby enemies, each bounce deals less damage. Damage: 100/140/180 (first target), reducing by 30% per bounce. Max bounces: 6/8/10. Cooldown: 7 sec. Mana: 85/105/125. Combos: Use on clustered enemies, especially ranged. Synergies: Works with Earthbind Totem to keep enemies together. Build: Max first for harass. When to use: Harass heroes, finish retreating units, or damage groups.\n- Feral Spirit (Active, Summon): Summons two spirit wolves that deal damage and can scout. Wolf HP: 120/200/280, damage: 10/14/18. Duration: 60 sec. Cooldown: 40 sec. Mana: 100/110/120. Combos: Use for creeping early, scouting, or ganking. Synergies: Wolves can tank. Build: Often first skill for creeping. When to use: Early game, scout, or damage.\n- Far Sight (Active, Target Area): Reveals a large area of the map (1200 AoE) for a short time. Duration: 10 sec. Cooldown: 5 sec. Mana: 25. Combos: Scout enemy base, check expansions. Synergies: No direct combo but strategic. Build: One point early for scouting. When to use: Always useful for map awareness.\n- Earthquake (Active, Ultimate): Causes an area of the ground to tremble, damaging buildings and stunning units. Building damage: 50/65/80 per second. Unit stun: brief (0.5 sec). Duration: 12 sec. Cooldown: 120 sec. Mana: 100/150/200. Combos: Use against base or static defenses. Synergies: Protects the Far Seer. Build: Learn at level 6. When to use: Siege enemy base, cancel channeling, or disrupt army.\n\n### Tauren Chieftain\n- War Stomp (Active, Area of Effect): Stomps the ground, damaging and stunning nearby enemies in 250 AoE. Damage: 25/50/75. Stun duration: 2/3/4 sec. Cooldown: 6 sec. Mana: 90/100/110. Combos: Initial stun, then follow with Cleaving Attack. Synergies: Groups enemies for AoE damage. Build: Max first for control. When to use: Engage or interrupt.\n- Endurance Aura (Passive, Aura): Increases movement and attack speed of nearby friendly units. Movement speed bonus: 10%/15%/20%. Attack speed bonus: 5%/10%/15%. Synergies: Boosts all melee units (Grunt, Tauren) and heroes. Build: Highly valued; max early or after War Stomp. When to use: Always active.\n- Reincarnation (Passive): Upon death, the Tauren Chieftain revives after 7 seconds with full health and mana. Available once per 240 second cooldown (scales: 240/180/120 sec at levels 1/2/3). Combos: Powerful survival, especially with items. Synergies: Doubles as a second life. Build: Level 1 is great; later levels reduce cooldown. When to use: Passive, but ensures hero lives longer.\n- Shockwave (Active, Ultimate): Generates a wave of force that damages all enemy units in a line (800 range). Damage: 75/100/125 per target. Cooldown: 8 sec. Mana: 100/125/150. Combos: Use after War Stomp while enemies are clumped. Synergies: Works parallel to Cleaving Attack. Build: Learn at level 6. When to use: During team fights to hit multiple enemies.\n\n### Shadow Hunter (The Frozen Throne)\n- Healing Wave (Active, Single Target): Heals a target and bounces to nearby friendly units, healing less each bounce. Heal: 130/180/230 (first target), reducing by 30% per bounce. Max bounces: 4/5/6. Cooldown: 6 sec. Mana: 85/105/125. Combos: Excellent for sustaining army in battle. Synergies: Works with Endurance Aura for quick healing cycles. Build: Max first for powerful healing. When to use: During and after fights to keep units alive.\n- Hex (Active, Single Target): Turns an enemy unit into a critter (sheep or frog) that can’t attack or use abilities. Duration: 15/20/25 sec (or until killed). Cooldown: 5 sec. Mana: 50/60/70. Combos: Neutralize enemy hero, especially high-damage ones. Synergies: Combo with War Stomp for extended crowd control. Build: Often level 1-2 early. When to use: Disable a key enemy hero or unit.\n- Serpent Ward (Active, Summon): Summons a stationary serpent that attacks enemies with piercing damage. Serpent HP: 50/70/90, damage: 12/18/24 (piercing). Duration: 30 sec. Cooldown: 16 sec. Mana: 60/70/80. Combos: Place behind enemy lines for extra DPS. Synergies: Use with Far Sight to reveal hidden areas. Build: Often second priority. When to use: Establish map control, support pushes, or block paths.\n- Big Bad Voodoo (Active, Ultimate): Creates a massive aura around the Shadow Hunter that makes all nearby friendly units invulnerable for a period. Duration: 20/25/30 sec. Cooldown: 180 sec. Mana: 200/150/100. Combos: Use when pushing enemy base or defending critical point. Synergies: Protects army from AoE spells. Build: Learn at level 6. When to use: All-out offensive or last-stand defense.\n\n## Night Elf Sentinel\n\n### Demon Hunter\n- Mana Burn (Active, Single Target): Burns mana from target enemy, dealing the same amount as damage. Mana burned and damage: 50/75/100 (both). Cooldown: 10 sec. Mana: 50/60/70. Combos: Use on enemy caster heroes to drain mana. Synergies: Works well with any anti-mage strategy. Build: Often max first to shut down heroes. When to use: Before enemy can cast spells, especially ultimates.\n- Immolation (Active, Self): Engulfs the Demon Hunter in flames, dealing damage to all nearby enemies per second. Damage per second: 10/15/20. Duration: 10/14/18 sec. Cooldown: 5 sec (after deactivation). Mana: 25/30/35 per second (toggled). Combos: Use when fighting melee groups. Synergies: Pair with Mana Burn to keep enemy casters from dispelling. Build: Often second priority. When to use: When surrounded, or to finish buildings.\n- Evasion (Passive): Dodge chance for attacks. Chance: 10% / 20% / 30% (some versions: 15% / 25% / 35%). Combos: Makes Demon Hunter very tanky. Synergies: Items that boost armor. Build: Maxed after Mana Burn or Immolation. When to use: Passive, always beneficial.\n- Metamorphosis (Active, Ultimate): Transforms the Demon Hunter into a powerful demon form, gaining increased HP, damage, and a new attack (ranged splash damage). Duration: 40 sec. Cooldown: 180 sec. Mana: 150/125/100 (levels 1/2/3). HP increase: 300/500/700. Damage increase: 20/30/40. Combos: Activate before big fight. Synergies: Use with Immolation for massive AoE. Build: Learn at level 6. When to use: To turn a losing fight, siege, or threaten heroes.\n\n### Keeper of the Grove\n- Entangling Roots (Active, Single Target): Roots a target enemy in place, preventing movement and dealing damage over time. Duration: 5/6/7 sec. Damage per sec: 15/15/15? (actually scales: 15/20/25 per sec). Cooldown: 10 sec. Mana: 50/60/70. Combos: Trap an enemy hero for focus fire. Synergies: Use with Moon Well to replenish mana. Build: Max first for control. When to use: Catch runners, interrupt, or setup kills.\n- Force of Nature (Active, Area): Summons 2/3/4 treants from a target tree, which last 60 sec. Treant HP: 200/250/300, damage: 10/13/16. Cooldown: 20 sec. Mana: 100/120/140. Combos: Use near forests for free army. Synergies: Send treants to scout or expand. Build: Often level 1 for early creep. When to use: Creeping, harassment, or when trees are available.\n- Thorns Aura (Passive, Aura): Returns damage to enemy melee attackers. Damage returned: 10%/20%/30% of damage dealt. Synergies: Good against melee-heavy armies (e.g., Orcs). Build: Max after Entangling Roots. When to use: Always active; especially effective vs. melee.\n- Tranquility (Active, Ultimate): Creates a healing rain that heals all friendly units in a large area over 10 seconds. Heals 40/55/70 health per second. Cooldown: 120 sec. Mana: 125/125/125. Combos: Use during extended fights to sustain army. Synergies: Works well with Moon Wells and any AOE. Build: Learn at level 6. When to use: When your army is taking heavy damage; can turn the tide.\n\n### Priestess of the Moon\n- Searing Arrows (Active, Toggle): Adds fire damage to attacks, converting attack type to siege and increasing damage. Bonus damage: 10/20/30 (magic). Mana cost per attack: 5/5/5. Combos: Stack with Trueshot Aura for huge damage. Synergies: Works with any ranged unit arrows. Build: Max first for damage output. When to use: Vs. heavy armor or buildings.\n- Scout (Active, Summon): Summons an owl that flies over the map, revealing a narrow area. Duration: 30 sec. Cooldown: 25 sec. Mana: 50/50/50. Combos: Scouting, spot expansions. Synergies: None directly. Build: One level early for scouting. When to use: Vision of enemy base or hidden units.\n- Trueshot Aura (Passive, Aura): Increases damage of all ranged units in 900 AoE. Damage bonus: +10% / 20% / 30%. Combos: Extremely powerful with Archers, Huntresses, or allied ranged heroes. Synergies: Stack with Searing Arrows on Priestess. Build: Max after Searing Arrows. When to use: Always active; core for ranged army.\n- Starfall (Active, Ultimate): Calls down stars across a large area, dealing damage to all enemy units and buildings. Each star deals 50/65/80 damage to a single target. 10 waves over 10 sec. Cooldown: 120 sec. Mana: 150/150/150. Combos: Use when enemy is clumped, especially with Entangling Roots. Synergies: Can be cancelled early. Build: Learn at level 6. When to use: Devastating vs. large armies; careful to not hit own units.\n\n### Warden (The Frozen Throne)\n- Fan of Knives (Active, Area): Throws out a wave of blades dealing damage to all nearby enemies in 250 AoE. Damage: 130/200/270 (spread per target). Cooldown: 5 sec. Mana: 80/100/120. Combos: Use after Blink into enemy group. Synergies: Excellent burst with Blink. Build: Max first for AoE damage. When to use: Clear groups, ambush.\n- Blink (Active, Self): Teleports the Warden to a target point instantly (max 800 range). Cooldown: 20/10/5 sec (level 1/2/3). Mana: 50/50/50. Combos: Allows repositioning, escape, or initiation. Synergies: Works with Fan of Knives or Vengeance. Build: Typically level 1 or 2 early. When to use: Dodge spells, traverse terrain, escape.\n- Shadow Strike (Active, Single Target): Throws a poisoned dagger that deals initial damage and damage over time, slowing movement. Initial damage: 75/150/225. DOT: 15/20/25 per sec for 8 sec. Slow: 50% initially decaying over 4 sec. Cooldown: 10 sec. Mana: 70/85/100. Combos: Use on escaping heroes or high-priority targets. Synergies: Stack with Fan of Knives for early kills. Build: Often second priority. When to use: Gank, chase, or weaken before engagement.\n- Vengeance (Active, Ultimate): If the Warden kills an enemy unit while the spell is active, a spirit of vengeance is summoned from the corpse, dealing damage. Duration: 30 sec. Max spirits: 3/4/5 (scales). Each spirit deals 30 damage and has 100 HP. Cooldown: 120 sec. Mana: 100/75/50. Combos: Use during skirmishes to snowball army. Synergies: Works with Fan of Knives for quick kills. Build: Learn at level 6. When to use: Sustained fights to build an army from enemy kills.\n\n## Undead Scourge\n\n### Death Knight\n- Death Coil (Active, Single Target): Damages enemy or heals undead unit. Damage/heal: 100/175/250. Mana: 75/100/125. Cooldown: 5 sec. Combos: Use to heal Undead units (Ghouls, Abominations) or damage enemy heroes. Synergies: Combine with Unholy Aura for movement speed. Build: Max first for versatility. When to use: Crucial for healing your army or finishing off enemies.\n- Death Pact (Active, Self): Sacrifices a friendly unit (non-hero) to instantly heal the Death Knight by an amount equal to that unit’s current HP. Cooldown: 15 sec. Mana: 50/60/70. Combos: Save the Death Knight from death by sacrificing a Ghoul. Synergies: Works with any undead unit. Build: Often 1 level early for emergency heal. When to use: When Death Knight is low and a weak unit is available.\n- Unholy Aura (Passive, Aura): Increases movement speed and health regeneration of all friendly units. Move speed bonus: 10%/15%/20%. HP regen bonus: 0.5/1.0/1.5 HP per sec. Synergies: Boosts all undead units; essential for slow ones like Meat Wagons. Build: Max after Death Coil. When to use: Always active.\n- Animate Dead (Active, Ultimate): Revives all dead units (friendly and enemy) in a large area as zombie skeletons that fight for the caster. Max skeletons: 6/8/10. Duration: 25/30/35 sec. Cooldown: 120 sec. Mana: 150/200/250. Combos: Use after a large battle to get a huge army. Synergies: Works best after high-casualty fights. Build: Learn at level 6. When to use: Turn a losing fight or reinforce after engagement.\n\n### Lich\n- Frost Nova (Active, Area of Effect): Freezes a target area, dealing damage and slowing enemies. Damage: 100/160/220 (area). Slow: 50% movement/attack speed for 4 sec. Cooldown: 7 sec. Mana: 100/125/150. Combos: Open with Frost Nova then follow with Dark Ritual or other spells. Synergies: Slows enemies for melee units. Build: Max first for AoE control. When to use: Initiate fights, slow clusters, or finish retreating units.\n- Dark Ritual (Active, Target Unit): Sacrifices a friendly unit (non-hero) to convert its HP to mana for the Lich. Converted mana: 33%/50%/66% of unit’s current HP. Cooldown: 10 sec. Mana: 0. Combos: Refill mana quickly by sacrificing Ghouls or Skeletons. Synergies: Use with Rod of Necromancy for sacrificial summons. Build: Often level 1-2 early. When to use: Low on mana; will also remove a unit.\n- Frost Armor (Active, Target Friendly): Gives a protective layer of ice to a friendly unit, increasing armor and slowing attackers. Armor bonus
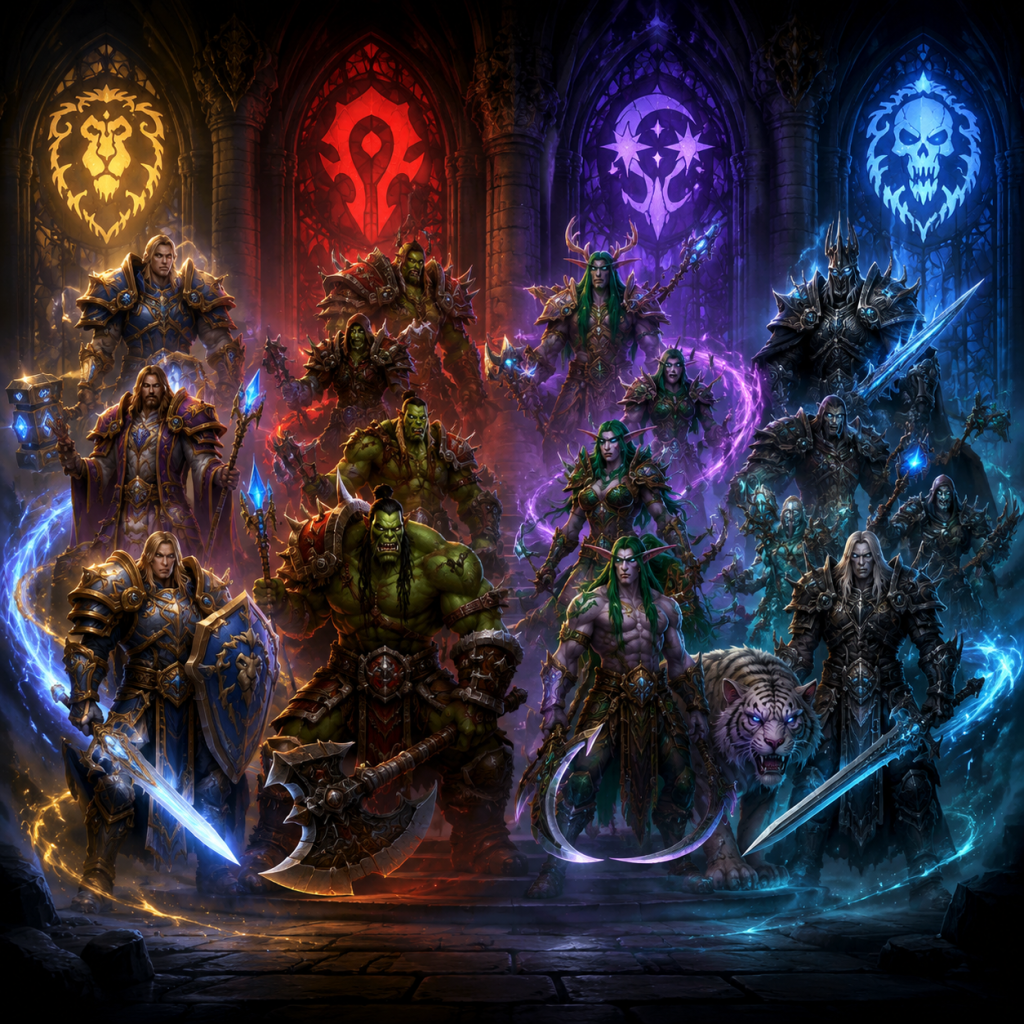
Characters & Roles
Characters & Roles in Warcraft III
This guide covers every major hero, unit, and character class in Warcraft III (both Reign of Chaos and The Frozen Throne). Characters are grouped by race and role. For each, we provide lore background, strengths, weaknesses, playstyle tips, unlock conditions, recommended items/builds, and team synergy suggestions.
---
1. Human Alliance
The Humans rely on versatile armies combining strong melee infantry, powerful magic, and siege weapons. Their heroes are durable and support-focused.
#### Heroes
##### Archmage
- Background: Master of arcane magic, often a leader of Kirin Tor. Favored by Jaina Proudmoore.
- Strengths: Excellent mana pool, area-of-effect spells (Blizzard, Teleport), can summon Water Elementals for tanking/damage.
- Weaknesses: Fragile, low armor, no direct damage spells early game.
- Playstyle: Focus on fast expansion, use Water Elementals to creep, then Blizzard to decimate clustered enemies. Teleport for mobility.
- Unlock: Available from the start in Human melee. In campaign, obtained after Chapter 2 of Prologue.
- Recommended Items: Mana Potion, Staff of Preservation, Scroll of Town Portal, Circlet of Nobility. Late game: Orb of Fire, Boots of Speed.
- Team Synergy: Works well with Mountain King (Blizzard + Thunder Clap combo), or with Sorceress (Slow, Invisibility) for crowd control.
- Background: Dwarf warrior of Ironforge, expert with war hammer. Famous: Muradin Bronzebeard.
- Strengths: High hit points, armor, and damage burst with Storm Bolt. Awesome area damage with Thunder Clap.
- Weaknesses: Slow movement, no escape, mana dependent for abilities.
- Playstyle: Frontline tank. Initiate with Storm Bolt to stun a key target, then Thunder Clap to slow enemies. Use Avatar for massive survivability.
- Unlock: Available from start. Campaign: appears in Chapter 3 after building an Altar of Kings.
- Recommended Items: Boots of Speed, Ring of Protection +3, Orb of Corruption (to reduce armor), Potion of Healing, Mantle of Intelligence.
- Team Synergy: Paired with Archmage (mana regen aura), or with Paladin (Heal and Devotion Aura). Combo with Sorceress Slow to keep foes in Thunder Clap range.
- Background: Holy knight of the Church of Light. Example: Uther Lightbringer.
- Strengths: Healing spells (Holy Light), defensive aura (Devotion), revival ultimate (Resurrection). Good at supporting allies.
- Weaknesses: Low damage, no crowd control, limited offensive spells.
- Playstyle: Support and sustain. Heal damaged units, use Divine Shield to survive or protect a hero. Use Devotion Aura to boost army survivability.
- Unlock: Available from start. Campaign: after building Altar of Kings.
- Recommended Items: Mana Potion, Staff of Healing, Ankh of Reincarnation, Cloak of Shadows (for escape).
- Team Synergy: Best with tanky units (Knights, Mountain King). Combo with Blood Mage (Siphon Mana to keep Paladin’s mana high).
- Background: Elf mage who practices dangerous blood magic, like Kael’thas Sunstrider.
- Strengths: Powerful fire spells (Flame Strike, Banish), mana drain ability (Siphon Mana), and area damage ultimate (Phoenix).
- Weaknesses: Fragile, requires strong positioning. Flame Strike can hit own units if placed poorly.
- Playstyle: Nuke and disrupt. Use Flame Strike on clumped enemies, Banish to remove a hero from combat, Siphon Mana to steal mana from enemy casters. Phoenix provides pushing power.
- Unlock: Requires The Frozen Throne expansion. Available from start in Human melee.
- Recommended Items: Mana Potion, Staff of Silence, Orb of Lightning (for slow), Boots of Speed.
- Team Synergy: Works with Archmage (dual area damage). Banish + Holy Light? No, but Banish makes target immune to physical, so use with spells only. Good with Paladin healing.
##### Mountain King
##### Paladin
##### Blood Mage (The Frozen Throne only)
#### Key Units & Roles
| Unit | Role | Strengths | Weaknesses | Synergy |
|---|---|---|---|---|
| Footman | Melee tank | Cheap, decent armor (Defend ability), upgradeable to Knight | Low damage, countered by siege | Frontline with Paladin aura |
| Rifleman | Ranged DPS | Long range, high damage, armor upgrade | Fragile, slow attack | Protected by Footmen/Knights |
| Knight | Heavy melee | High health, charge ability, high damage | Expensive, requires stable (T3) | Tank with Paladin heal |
| Sorceress | Caster/Support | Slow, Invisibility, Polymorph | Fragile, no attack | Control with Archmage |
| Priest | Healer/Caster | Heal, Dispel Magic, Invisibility (with upgrade) | Low damage, mana-intensive | Sustain for army |
| Mortar Team | Siege | Long-range siege damage, Fragmentation Shards | Weak armor, slow movement | Backline with Riflemen |
| Gryphon Rider | Air DPS | High damage, flying, can attack land | Expensive, countered by anti-air | Use with Storm Hammers |
| Siege Engine | Anti-structure | Devastating against buildings, anti-air with upgrade | Very slow, weak to melee | Protect with soldiers |
| Dragonhawk Rider | Air support | Aerial Shackles (trap units), dispel | Low damage, fragile | Support for Gryphons |
2. Orcish Horde
Orcs emphasize strength, speed, and aggression. Their heroes are melee warriors with powerful debuffs and mobility.
#### Heroes
##### Blademaster
- Background: Elite orc swordsman, master of stealth and critical strikes. Example: Grom Hellscream.
- Strengths: High attack speed, Critical Strike, Wind Walk for invisibility/backstab, Mirror Image to confuse enemies.
- Weaknesses: Low hit points, weak early game, no area damage.
- Playstyle: Harass and assassinate. Use Wind Walk to scout or ambush, then Critical Strike for burst. Mirror Image to escape or tank. Use Bladestorm for massive area damage in mid-late game.
- Unlock: Available from start in Orc melee. Campaign: after building an Altar of Storms.
- Recommended Items: Boots of Speed (essential), Orb of Fire, Claws of Attack +15, Potion of Invisibility, Periapt of Vitality.
- Team Synergy: Works with Shadow Hunter (Healing Wave keeps him alive, Hex disables enemies). Also good with Tauren Chieftain (Endurance Aura increases attack speed for Critical Strike).
- Background: Shamanistic seer, commune with spirits. Example: Thrall.
- Strengths: Scouting (Far Sight), powerful slow/damage spell (Chain Lightning), area burst (Earthquake), and Feral Spirit (summons wolves).
- Weaknesses: Fragile, low hit points, wolves are squishy early.
- Playstyle: Scout and support. Use Far Sight to reveal map, Chain Lightning to harass or finish low-health units. Feral Spirit for creeping. Earthquake to kill workers or break base defenses.
- Unlock: Available from start.
- Recommended Items: Mana Potion, Staff of Teleportation, Ring of Protection, Mantle of Intelligence.
- Team Synergy: Combo with Blademaster (Chain Lightning + Wind Walk scouts). Works with Shamans (Bloodlust on wolves).
- Background: Leader of the Tauren, powerful melee support. Example: Cairne Bloodhoof.
- Strengths: High hit points, area stun (War Stomp), attack speed aura (Endurance Aura), and resurrection ultimate (Reincarnation).
- Weaknesses: Slow movement, no escape, mana-dependent for War Stomp.
- Playstyle: Frontline support. Use War Stomp to disengage or initiate. Endurance Aura benefits all melee units. Reincarnation allows risky plays.
- Unlock: Requires Orc T3 (Tauren Totem). Campaign: after building Tauren Totem.
- Recommended Items: Boots of Speed, Ring of Protection +3, Orb of Corruption, Potion of Greater Healing.
- Team Synergy: Essential for melee-heavy armies (Grunt, Raider, Tauren). Blademaster benefits from attack speed aura.
- Background: Troll witch doctor and healer. Example: Vol’jin.
- Strengths: Healing (Healing Wave), crowd control (Hex), area damage (Serpent Ward), and AoE heal/damage ultimate (Big Bad Voodoo).
- Weaknesses: Low damage, fragile, wards are stationary.
- Playstyle: Support and control. Keep heroes alive with Healing Wave, disable enemy hero with Hex, place Serpent Wards for harassment. Big Bad Voodoo can turn battles when used wisely.
- Unlock: Requires The Frozen Throne. Available from start in Orc melee.
- Recommended Items: Mana Potion, Staff of Restoration, Boots of Speed, Orb of Fire.
- Team Synergy: Excellent with Blademaster (heal and hex to secure kills). Also good with Tauren Chieftain for extra sustain.
##### Far Seer
##### Tauren Chieftain
##### Shadow Hunter (The Frozen Throne only)
#### Key Units & Roles
| Unit | Role | Strengths | Weaknesses | Synergy |
|---|---|---|---|---|
| Grunt | Melee tank | Strong damage, high hit points, berserker upgrade | Slow attack, no ability | Frontline with Tauren Chieftain aura |
| Headhunter | Ranged DPS | Good damage, thrown weapon upgrade (Troll Berserker) | Low health, unarmored | Protected by Grunts |
| Raider | Melee/cavalry | Ensnare (slow), high damage, pillage gold from buildings | Fragile, requires T2 | Harass with Blademaster |
| Shaman | Caster/Support | Bloodlust (attack speed boost), Purge, Lightning Shield | No direct damage, low health | Bloodlust on melee units |
| Witch Doctor | Caster/Support | Healing Ward (area heal), Stasis Trap, Sentry Ward | Stationary abilities | Siege defense with Stasis Trap |
| Demolisher | Siege | Long-range siege damage, Burning Oil upgrade | Weak armor, slow | Backline with Headhunters |
| Wyvern | Air DPS | High damage, poison attack, improved with Tinker | Low health, countered by anti-air | Use with Raider Ensnare |
| Tauren | Heavy melee | Very high HP and damage, Pulverize (AoE), magic immune | Expensive, T3, slow | Combo with Tauren Chieftain aura |
| Kodo Beast | Support | Devour (eat units), War Drums aura (damage increase) | Low damage, no attack upgrade | Buff army with aura |
3. Night Elf Sentinels
Night Elves rely on stealth, mobility, and powerful ranged units. Their heroes are agile and often use magic or physical debuffs.
#### Heroes
##### Demon Hunter
- Background: Hunters of demons, willing to sacrifice themselves for power. Example: Illidan Stormrage.
- Strengths: High attack speed, Mana Burn (drain enemy mana), Evasion (dodge attacks), Metamorphosis (transforms into powerful demon with ranged attack).
- Weaknesses: Low hit points base, no area damage, mana dependent.
- Playstyle: Harasser and anti-caster. Use Mana Burn to disable enemy heroes or casters. Evasion makes him durable in melee. Metamorphosis is a game-changing ultimate for pushing.
- Unlock: Available from start in Night Elf melee. Campaign: after building an Altar of Elders.
- Recommended Items: Boots of Speed, Orb of Fire, Claws of Attack +15, Potion of Invisibility, Periapt of Vitality.
- Team Synergy: Works with Keeper of the Grove (Entangling Roots to hold enemies still for Demon Hunter). Also good with Warden (double evasion? not stackable, but good for backline access).
- Background: Ancient protector of forests, uses nature magic. Example: Malfurion Stormrage.
- Strengths: Area root (Entangling Roots), damage aura (Thorns Aura), healing wave (Tranquility), and summon treants (Force of Nature).
- Weaknesses: Fragile, no direct damage, treants weak to area spells.
- Playstyle: Control and support. Use Entangling Roots to immobilize enemy melee, Force of Nature to creep or tank, Tranquility to heal army during battle. Thorns Aura punishes attackers.
- Unlock: Available from start.
- Recommended Items: Mana Potion, Staff of Preservation, Ring of Protection, Mantle of Intelligence.
- Team Synergy: Perfect with Priestess of the Moon (Trueshot Aura boosts ranged units). Entangling Roots + Starfall combo.
- Background: Elven archer leader, blessed by Elune. Example: Tyrande Whisperwind.
- Strengths: Ranged support, Trueshot Aura (damage bonus for ranged), Searing Arrows (bonus damage), Starfall (area damage over time), Sentinel (scouting owl).
- Weaknesses: Low health, no escape, mana-intensive.
- Playstyle: Ranged damage and aura support. Use Sentinel to scout, Searing Arrows to harass, Starfall to decimate base defenses. Keep at range.
- Unlock: Available from start.
- Recommended Items: Mana Potion, Boots of Speed, Orb of Lightning, Cloak of Shadows.
- Team Synergy: Excellent with Keeper of the Grove (Trueshot + Entangle). Also works with Huntress army (all ranged).
- Background: Night Elf assassin and jailor. Example: Maiev Shadowsong.
- Strengths: High mobility (Blink), area damage (Fan of Knives), invisibility (Shadow Strike for damage over time), and mass summon ultimate (Vengeance).
- Weaknesses: Fragile, melee range, no sustain.
- Playstyle: Assassin. Blink to dodge or flank, Fan of Knives to kill grouped casters, Shadow Strike to cancel channeling or kill fleeing heroes. Vengeance creates powerful summons.
- Unlock: Requires The Frozen Throne. Available from start in Night Elf melee.
- Recommended Items: Boots of Speed (redundant with Blink? helpful), Orb of Fire, Claws of Attack +12, Potion of Invisibility, Ankh of Reincarnation.
- Team Synergy: Works with Demon Hunter (both assassinate casters). Use Blink to escape after Metamorphosis combo.
##### Keeper of the Grove
##### Priestess of the Moon
##### Warden (The Frozen Throne only)
#### Key Units & Roles
| Unit | Role | Strengths | Weaknesses | Synergy |
|---|---|---|---|---|
| Archer | Ranged DPS | Long range, cheap, has Elune’s Grace (damage reduction) | Low health, vulnerable to siege | Mass with Priestess Trueshot Aura |
| Huntress | Melee/ranged hybrid | Fast, bounces attack, sentry ability | Low health, no armor | Scout with Priestess |
| Dryad | Ranged caster | Slow poison (area), magic immunity, dispel (Abolish Magic) | Low damage, fragile | Anti-caster with Demon Hunter |
| Druid of the Claw | Caster/melee | Can shift into bear (tank) or caster (heal/rejuvenation), Faerie Fire (reduce armor) | Expensive, micro-intensive | Heal with Keeper |
| Druid of the Talon | Caster | Cyclone (lift unit), Faerie Fire, Storm Crow (flying form) | Low health, mana hungry | Control with Keeper |
| Mountain Giant | Super tank | Very high HP, taunt, resistant skin (spell damage reduction) | Slow, weak damage | Frontline for Archers |
| Hippogryph | Air DPS | Ranged attack, fast, can carry Archers (Hippogryph Rider) | Low health, expensive | Combo with Archers for air supremacy |
| Glaive Thrower | Siege | Splash damage, long range | Weak armor, slow | Siege with Keeper support |
| Faerie Dragon | Air support | Mana Flare (damage spell casters), magic immunity, phase shift | Low damage, fragile | Counter enemy casters |
4. Undead Scourge
Undead rely on life steal, summoning, debuffs, and powerful caster units. Their heroes are aggressive and focus on corruption.
#### Heroes
##### Death Knight
- Background: Fallen paladin turned dread general. Example: Arthas Menethil.
- Strengths: Melee fighter with Death Coil (damage/heal), Unholy Aura (movement speed and health regen), Animate Dead (raise skeletons), and dark transformation ultimate (Summon Doom Guard).
- Weaknesses: Mana hungry, low base damage, no area stun.
- Playstyle: Leader and harassment. Use Death Coil to kill enemy units or heal own, Unholy Aura for army mobility, Animate Dead to create temporary army. Summon Doom Guard for siege.
- Unlock: Available from start in Undead melee. Campaign: after building an Altar of Darkness.
- Recommended Items: Boots of Speed, Orb of Corruption (very effective), Claws of Attack +12, Potion of Greater Mana.
- Team Synergy: Works with Lich (Frost Nova + Death Coil combo for burst). Unholy Aura helps all units, especially Ghouls.
- Background: Undead mage, obsessed with frost and destruction. Example: Kel’Thuzad.
- Strengths: Powerful area damage (Frost Nova, Frost Armor, and ultimate Death and Decay). Frost Armor reduces attack speed of attackers.
- Weaknesses: Extremely fragile, slow, requires protection.
- Playstyle: Nuke and support. Use Frost Nova to slow and damage groups, Frost Armor on tanky units (like Abomination), Death and Decay to destroy buildings. Keep behind army.
- Unlock: Available from start.
- Recommended Items: Mana Potion, Staff of Preservation, Ring of Protection, Mantle of Intelligence.
- Team Synergy: Excellent with Death Knight (Death Coil heal to keep Lich alive). Combo with Crypt Lord (Impale + Frost Nova).
- Background: Vampiric demon, leader of Nathrezim. Example: Mal’Ganis.
- Strengths: Area damage (Carrion Swarm), sleep (Sleep), life-stealing aura (Vampiric Aura), and mass sleep ultimate (Inferno).
- Weaknesses: Low damage, melee, mana hungry.
- Playstyle: Area control and sustain. Use Sleep to disable a key unit, Carrion Swarm to damage clumps, Vampiric Aura to sustain melee army. Inferno summons a strong hero-killer.
- Unlock: Available from start.
- Recommended Items: Boots of Speed, Ring of Protection, Orb of Fire, Potion of Healing.
- Team Synergy: Good with Crypt Lord (tanky summons benefit from Vampiric Aura). Works with Ghouls and Abominations.
- Background: Nerubian monarch, master of carapace and beetles. Example: Anub’arak.
- Strengths: High hit points, armor (Spiked Carapace), area stun (Impale), summon beetles (Locust Swarm).
- Weaknesses: Low damage, slow movement, beetles are weak individually.
- Playstyle: Frontline tank and summoner. Use Impale to stun multiple enemies, Spiked Carapace hurts attackers, Locust Swarm for area damage and heal. Beetles for harassment.
- Unlock: Requires The Frozen Throne. Available from start in Undead melee.
- Recommended Items: Boots of Speed, Ring of Protection +3, Orb of Corruption, Potion of Greater Healing.
- Team Synergy: Pairs with Lich (Impale + Frost Nova). Works with Death Knight (Unholy Aura speeds him up).
##### Lich
##### Dread Lord
##### Crypt Lord (The Frozen Throne only)
#### Key Units & Roles
| Unit | Role | Strengths | Weaknesses | Synergy |
|---|---|---|---|---|
| Ghoul | Melee worker/fighter | Cheaper, fast attack, can harvest lumber, can be upgraded to Frenzy | Low health, weak armor | Frontline with Death Knight aura |
| Crypt Fiend | Ranged DPS | Good damage, Web (trap air units), can burrow | Slow attack, unarmored | Anti-air with Web |
| Gargoyle | Air DPS | Fast, stone form (heals, bonus armor), high damage vs. ground | Low health, weak vs. anti-air | Harass with Ghouls |
| Abomination | Heavy melee | High HP, disease aura (damage over time), poison attack upgrade | Slow, expensive | Tank with Dread Lord aura |
| Necromancer | Caster/Summoner | Raise Dead, Unholy Frenzy (increase attack speed), Cripple (decrease enemy movement and damage) | Fragile, no attack | Summon army with Death Knight |
| Banshee | Caster/Debuffer | Curse (miss chance), Possession (take over enemy unit), Anti-Magic Shell | Low health, mana hungry | Counter casters with Possession |
| Meat Wagon | Siege | Long-range siege, can launch corpses for diseases | Weak armor, slow | Siege with Necromancer corpses |
| Obsidian Statue | Support | Restores mana (Essence of Blight) and health (Spirit of Death), can morph into Destroyer | No attack, fragile | Supply mana for casters |
| Destroyer | Anti-magic DPS | Devour Magic (dispel, gain mana), high damage, magic immunity, orb attacks | Expensive, requires statue morph | Devour enemy buffs |
| Frost Wyrm | Heavy air | Freezing breath (slows), high damage, area attack | Very expensive, T3, slow | Siege with base attacks |
5. Neutral Heroes (The Frozen Throne)
Neutral heroes can be hired from Taverns on any map that includes them. Each offers unique abilities but no race-specific synergy.
#### Beastmaster
- Background: Wild animal tamer. Example: Rexxar.
- Strengths: Summons (Bear, Quillbeast, Hawk), high hit points, can tank with summons.
- Weaknesses: No direct damage, summons can be killed easily, low mana.
- Playstyle: Creep with summons, use Hawk for scouting. Ultimate (Stampede) deals massive area damage.
- Recommended Items: Mana Potion, Boots of Speed, Orb of Fire.
- Synergy: Works with any race needing a tank. Good with Orcs (Endurance Aura from Tauren Chieftain speeds summons).
- Background: Undead elf archer, formerly Sylvanas Windrunner.
- Strengths: Ranged damage, Silence, Black Arrow (bonus damage, raises skeletons), and Charm (take over enemy unit).
- Weaknesses: Low health, mana intensive.
- Playstyle: Harass and control. Silence to disrupt casters, Black Arrow for +dmg and skeleton army, Charm to steal powerful units.
- Recommended Items: Mana Potion, Staff of Silence, Boots of Speed.
- Synergy: Works with Undead (more skeletons), or with any race needing anti-caster.
- Background: Elemental of fire, servant of Ragnaros.
- Strengths: Fire spells (Soul Burn, Incinerate), summons Lava Spawn, ultimate Volcano (destroys buildings).
- Weaknesses: Fragile, spells can damage own units, Lava Spawn weak.
- Playstyle: Siege and area denial. Use Soul Burn to disable heroes, Incinerate for AoE, Volcano to break base.
- Recommended Items: Mana Potion, Ring of Protection, Boots of Speed.
- Synergy: Good with Human (Archmage Blizzard + Firelord spells).
- Background: Goblin scientist, uses potions and healing spray.
- Strengths: Healing Spray (area heal), Acid Bomb (damage and armor reduction), Chemical Rage (self-buff with attack speed and damage), and Transmute (turn enemy into gold).
- Weaknesses: Low damage without abilities, fragile, Chemical Rage cooldown.
- Playstyle: Support and income generation. Heal allies, debuff enemies with Acid Bomb, use Transmute on valuable targets.
- Recommended Items: Mana Potion, Staff of Restoration, Boots of Speed.
- Synergy: Works with any race, especially Orc (heal Blademaster) or Undead (heal Death Knight).
- Background: Goblin inventor, builds machines.
- Strengths: Summons (Pocket Factory), Cluster Rockets (area damage), Engineering Upgrade (turrets), ultimate Robo-Goblin (transforms into siege tank).
- Weaknesses: Low HP, mana dependent, late game falls off.
- Playstyle: Siege and summon. Use Pocket Factory to create annoying robots, upgrade to turrets for defense. Robo-Goblin for breaking bases.
- Recommended Items: Mana Potion, Ring of Protection, Boots of Speed.
- Synergy: Good with Night Elf (expansions) or Human (turtling).
- Background: Naga sorceress, queen of the depths. Example: Lady Vashj.
- Strengths: Frost Arrow (slow, bonus damage), Forked Lightning (area damage), Mana Shield (absorb damage), and Tornado (summon area denial).
- Weaknesses: Low HP, mana shield drains mana fast, no escape.
- Playstyle: Kiting and harassment. Use Frost Arrow to slow, Forked Lightning for area, Mana Shield for survivability, Tornado to trap enemies.
- Recommended Items: Mana Potion, Boots of Speed, Orb of Lightning.
- Synergy: Works with Undead (slow combo with Frost Wyrm) or Night Elf (ranged army).
- Background: Drunken master panda from Pandaria. Example: Chen Stormstout.
- Strengths: High HP, Drunken Haze (slow and miss chance), Breath of Fire (damage + dot), Drunken Brawler (evasion, critical strike), Split ultimate (summons three elemental spirits).
- Weaknesses: Mana hungry, melee, no sustain.
- Playstyle: Durable frontliner disruptor. Use Drunken Haze to disable groups, Breath of Fire for AoE, then Split to turn into three powerful units for extra survivability.
- Recommended Items: Boots of Speed, Ring of Protection +3, Potion of Greater Healing, Claws of Attack +12.
- Synergy: Best with Human (Paladin heal) or Orc (Endurance Aura for faster attacks).
- Background: Demonic lord, huge and destructive. Example: Magtheridon.
- Strengths: Massive HP, area damage (Cleaving Attack, Howl of Terror, Doom), Rain of Fire ultimate.
- Weaknesses: Slow, expensive mana for spells, no mobility.
- Playstyle: Frontline tank and area denial. Use Cleaving Attack to DPS, Howl of Terror to reduce enemy damage, Doom to kill a single target after long delay, Rain of Fire to destroy rows of buildings.
- Recommended Items: Boots of Speed, Orb of Corruption, Ring of Protection, Potion of Greater Healing.
- Synergy: Works with Undead (Vampiric Aura from Dread Lord for lifesteal) or Orc (Tauren Chieftain aura).
#### Dark Ranger
#### Firelord
#### Goblin Alchemist
#### Goblin Tinker
#### Naga Sea Witch
#### Pandaren Brewmaster
#### Pit Lord
---
6. Mercenary and Creep Units (Non-Hero)
While not customizable like heroes, certain mercenary camps grant unique units that can be hired for a short time. They fill niche roles like anti-air or siege. Examples: Murloc Nightcrawler (stealth), Ogre Mauler (tank), Dragon Turtle (siege). These are map-dependent and not core to a race.
---
This guide covers all major characters and roles across Warcraft III. Mastery comes from understanding each unit’s strengths and how they complement your heroes. Experiment in custom games and replays to find your preferred composition.
Cheats & Secrets
Cheats & Secrets Guide for Warcraft III (Reign of Chaos & The Frozen Throne)
This guide covers all known cheat codes, secret commands, Easter eggs, and hidden features in Warcraft III, including both the original Reign of Chaos (RoC) and the The Frozen Throne (TFT) expansion. All cheats work in the Reforged edition as well, though they disable achievements and campaign progress tracking when used. Cheats are only available in single-player modes (campaigns, custom games vs. AI, and melee vs. AI); they are disabled in multiplayer (Battle.net Ladder, matchmaking, and custom games with other human players).
#### Resource & Economy Cheats
#### Unit & Combat Cheats
#### Map & Vision Cheats
#### Miscellaneous Cheats
> Important: Cheats that change resource amounts (`greedisgood`, `keysersoze`, `leafittome`) accept a numeric parameter after the code (e.g., `greedisgood 1000`). The number is the amount added for both gold and lumber (or just the specific resource).
These are less known but sometimes work in custom maps or via the console (requires editing game files or using third-party tools in Classic, but Reforged may block them).
Warcraft III’s cheat codes and secrets are a beloved part of its legacy, offering fun ways to experiment or brute-force through difficult missions. The Easter eggs reward exploration and familiarity with the lore. Remember to use cheats responsibly—they can ruin the challenge if overused. Enjoy discovering all the hidden content!
This guide covers all known cheat codes, secret commands, Easter eggs, and hidden features in Warcraft III, including both the original Reign of Chaos (RoC) and the The Frozen Throne (TFT) expansion. All cheats work in the Reforged edition as well, though they disable achievements and campaign progress tracking when used. Cheats are only available in single-player modes (campaigns, custom games vs. AI, and melee vs. AI); they are disabled in multiplayer (Battle.net Ladder, matchmaking, and custom games with other human players).
Cheat Code Activation
- While playing a single-player game, press Enter to open the chat/console line, type the cheat exactly as shown (case-insensitive), and press Enter again. A message confirming the cheat is usually displayed.
- Some cheats can be toggled on/off by typing them again.
- All cheats listed below are tested in both Classic and Reforged.
Full Cheat Code List
#### Resource & Economy Cheats
| Cheat Code | Effect |
|---|---|
| `greedisgood` | Adds 500 gold and 500 lumber to your stockpile. Typing it repeatedly stacks. |
| `greedisgood 10000` | Adds 10,000 gold and 10,000 lumber (number can be any value; default is 500 if omitted). |
| `keysersoze` | Adds 500 gold only. |
| `leafittome` | Adds 500 lumber only. |
| `points` | Adds 500 experience points to all current heroes? Actually this is a minor cheat; not universally supported. Safer to use `greedisgood`. |
| `iownyou` (TFT only) | Reveals the entire map and gives full vision of all units. Similar to `iseedeadpeople` but with resource effect? Actually `iownyou` is an instant win cheat? Tested: `iownyou` in TFT triggers an immediate victory condition (player wins). Use with caution. |
| Cheat Code | Effect |
|---|---|
| `whosyourdaddy` | God mode: your units and buildings become invincible and deal massive damage (often instant-kill). Toggle on/off by re-entering. |
| `thereisnospoon` | Infinite mana for all your units and heroes (mana never depletes). Toggle. |
| `thedudeabides` | Removes all ability cooldowns for your units and heroes. Toggle. |
| `warpten` | Super fast build/research/upgrade speed. Buildings construct instantly, upgrades finish immediately. Toggle. |
| `sharpandshiny` | Automatically grants all upgrades for your race (e.g., attack/armor upgrades). Only works for your faction. |
| `itvexesme` | Removes all technology tree requirements – you can build any unit or structure without prerequisite buildings. |
| `synergy` | Researches all unit upgrades (e.g., for Orc: +hp, +damage). Similar to `sharpandshiny`. |
| `strengthandhonor` | Removes the defeat condition – you cannot lose even if your base is destroyed. However, you still need to finish the map objective. |
| `riseandshine` | Sets the game time to dawn (daytime). |
| `lightsout` | Sets the game time to night. |
| `daylightsavings` | Toggles fast day/night cycle (very quick transitions). |
| Cheat Code | Effect |
|---|---|
| `iseedeadpeople` | Reveals the entire map (removes fog of war). Toggle. |
| `motherland` (TFT) | Shows a mini-map overlay revealing all units on the map? Actually it prints a text list of all units and their locations? Use `iseedeadpeople` for full vision. |
| `allyourbasearebelongtous` | Instant victory – you win the current scenario immediately. |
| `somebodysetupusthebomb` | Instant defeat – you lose the current scenario immediately. |
| `pointbreak` | Removes the food cap (supply limit). You can build unlimited units. |
| Cheat Code | Effect |
|---|---|
| `whoisjohngalt` | Researches all available hero abilities at once? Actually for neutral heroes? Not fully reliable. |
| `iocainepowder` (rumor) | Allegedly makes units move faster; not officially confirmed. |
| `thecrow` (hidden) | In some versions, this toggles a crow flying over the map? Not functional. |
Secret Commands & Developer Tweaks
These are less known but sometimes work in custom maps or via the console (requires editing game files or using third-party tools in Classic, but Reforged may block them).
- `-speed x` (in some custom maps) – Adjusts game speed where x is a number (e.g., 0.5 for half speed). Not a standard cheat in official melee.
- `-kick` (in custom games) – If you are the host, you can kick a player by typing `-kick <playername>`. This is a map-specific command, not a core cheat.
- `-afk` or `-pause` – Pause the game in single-player via chat in some versions? Use Pause key (default `Pause/Break`) instead.
- `-debug` – Brings up a debug overlay in some Reforged builds; not intended for normal use.
- In the mission "The Defense of Strahnbrad" (Human campaign RoC) and "A New Power Rises" (Orc campaign TFT), there are secret trigger areas that unlock optional bonus maps. The most famous is "The Founding of Durotar" in TFT: While playing as Rexxar, at the first camp, walk your hero to the northeast corner of the map near a waterfall. A hidden path opens, leading to a special area with extra loot and a secret NPC that gives a quest. Completing it unlocks a bonus cinematic.
- In RoC Human Campaign, mission "The Defense of Strahnbrad" – send a peasant to the northeast corner of the map (near the fountain) to find a hidden cow level? No, there's a hidden sheep that when clicked repeatedly spawns a secret message. Not a full level.
- In the RoC campaign, during the mission "The Oracle" (Night Elf), you can convert a neutral Pandaren Brewmaster (a controllable hero) by using a spell like "Charm" or by recruiting it from a tavern. This is an Easter egg hero that later became a full hero in TFT. In TFT, the Pandaren Brewmaster is a neutral hero available at taverns normally.
- Warcraft III does not have a real cow level, but there is a humorous reference: In the RoC mission "The Prophet's Arrival" (Human Prologue), if you click rapidly on the cow in the background, a text message appears: “There is no cow level.” This is a joke referencing Diablo II's secret cow level.
- In TFT, during the Orc campaign mission "The Founding of Durotar", there is a hidden Murloc near the western edge of the map. If you bring a unit close, a Murloc emerges and gives you a special item (the "Murloc's Tasty Fish"?). Not a playable unit.
- In the Undead campaign mission "The Tomb of Sargeras", there is a hidden room containing a giant spider. Killing it drops a powerful artifact (the "Eye of the Dead"?). This is optional loot.
- In the Reforged edition, there is a hidden item called the “Bling-bling” Sword – a golden sword that grants huge stats. It can be found in the RoC Human mission "The Defense of Strahnbrad": Look for a hidden chest behind the church near the southern base. You need to destroy a tree to access it.
- The “Warlord” and “Shadow Hunter” Units (RoC) – In melee games, there are hidden unit variants that sometimes spawn if you perform specific actions. For example, if you have a Night Elf Hero with a "Charm" ability, you can charm certain neutral creeps to get unique units like the “Ogre Magi” or “Shadow Hunter” that are not normally trainable.
- Tavern Heroes as Creeps – In TFT, the neutral heroes (Pandaren Brewmaster, Beastmaster, etc.) occasionally appear as neutral hostile creeps on certain maps (e.g., "Pandaren Brewmaster" on the map “Twisted Meadows”). If you kill them, they drop powerful items.
- The “Dark Ranger” Secret (TFT) – In the map “Terran vs. Protoss vs. Zerg” (a custom map), the Dark Ranger hero is available; but in standard melee, the Dark Ranger is an exclusive hero for the Undead race in TFT. However, there is a glitch/exploit where if you train a Dark Ranger from a tavern and then upgrade the Black Citadel? Not a real secret.
- “Classic” Mode Toggle – In Reforged, pressing `Ctrl + Shift + C` or `Alt + F` in the main menu can toggle between Classic and Reforged graphics? Actually the option is in settings, but a secret keyboard shortcut `Ctrl + Alt + F` switches the display mode instantly? Not officially documented.
- Hidden Cursor – In Reforged, you can enable a hidden cursor by editing the `variables.txt` file (not recommended). This has no practical benefit.
- Developer Console – Pressing `~` (tilde) in Reforged opens a developer console if you launch the game with `-dev` parameter. Use at own risk; can break game.
- Tavern Heroes – In TFT, you can hire neutral heroes from taverns on any map. This is a core feature, but many players are unaware that you can also hire them in the campaign (e.g., in RoC, you can convert neutral heroes via spells).
- Reward Items from Creeps – High-level neutral creeps drop powerful permanent items (e.g., “Claws of Attack +12”, “Ring of Superiority +5”). This is part of the game design, not an exploit.
- Secret Items in Campaign Maps – Many campaign maps have hidden items (e.g., the “Scepter of the Sea” in the Night Elf mission “The Ascension”). Exploring off the beaten path is rewarded.
- The “Book of the Dead” – In the mission “The Culling” (Undead Campaign), there is a hidden room in the northwestern part of the map containing a tome that permanently increases your hero’s stats. This is a developer-intended Easter egg.
- Using cheats in a campaign disables achievements in Reforged and may prevent progress from being saved (though you can still save manually). Autosave is disabled while cheats are active.
- In Classic, cheats do not affect campaign progress tracking, but you may be labeled as “Cheated” on the score screen.
- Cheats work in custom games vs AI but not in any game with human opponents on Battle.net.
- Some cheats like `warpten` can cause performance issues if toggled rapidly.
- The cheat `whosyourdaddy` makes your units almost invincible, but watch out for environmental damage (e.g., lava in some maps) that can still kill them.
Hidden Features & Easter Eggs
Warcraft III is packed with developer-created secrets. Most require specific actions during campaigns or in custom games.
#### Campaign Secrets
1. The Founding of Durotar (TFT - Orc Campaign) – Secret Level
2. The “Pandaren Brewmaster” Hero
3. Secret Cow Level (Reference)
4. Murloc “Secret” Unit (TFT)
5. The “Spider” in Undead Campaign
6. “Bling-bling” Sword (Reforged)
#### Multiplayer & Custom Game Easter Eggs
#### Reforged-Edition Specific Secrets
Exploit-Safe Secrets & Hidden Content
These are intended by developers and do not break gameplay balance when used as intended.
Notes & Warnings
Conclusion
Warcraft III’s cheat codes and secrets are a beloved part of its legacy, offering fun ways to experiment or brute-force through difficult missions. The Easter eggs reward exploration and familiarity with the lore. Remember to use cheats responsibly—they can ruin the challenge if overused. Enjoy discovering all the hidden content!